Stand-In: Clipping planes
This how-to will walk you through how to create and set up clipping planes in your scene. You can use clipping planes to improve the processing results further or to cull away unwanted sections in a mesh. You can read more about why you'd like to use clipping planes here. Clipping planes are supported by both Stand-In Far- and Near pipelines.
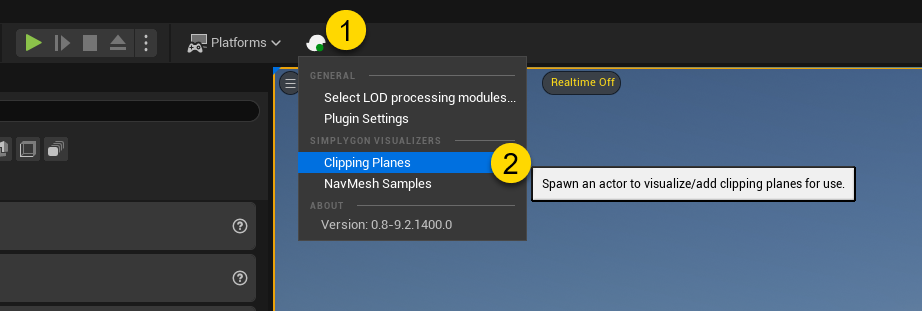
1. Create a Simplygon Clipping Planes Visualizer
Create a Clipping Planes Visualizer by going into the Simplygon option in the viewport toolbar and select "Clipping Planes".
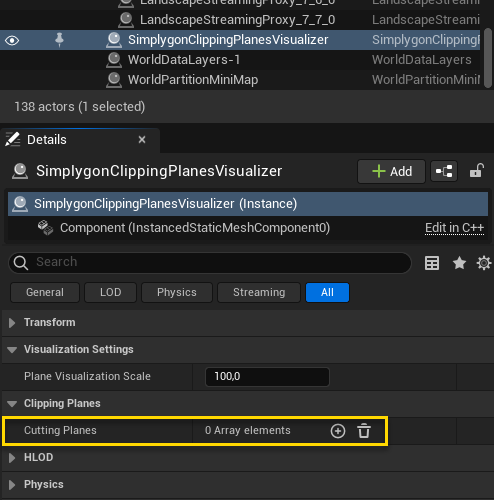
This will add a Simplygon Clipping Planes visualizer Actor in your World Outliner. Go into the details panel and add a new plane under Clipping Planes → Cutting Planes.
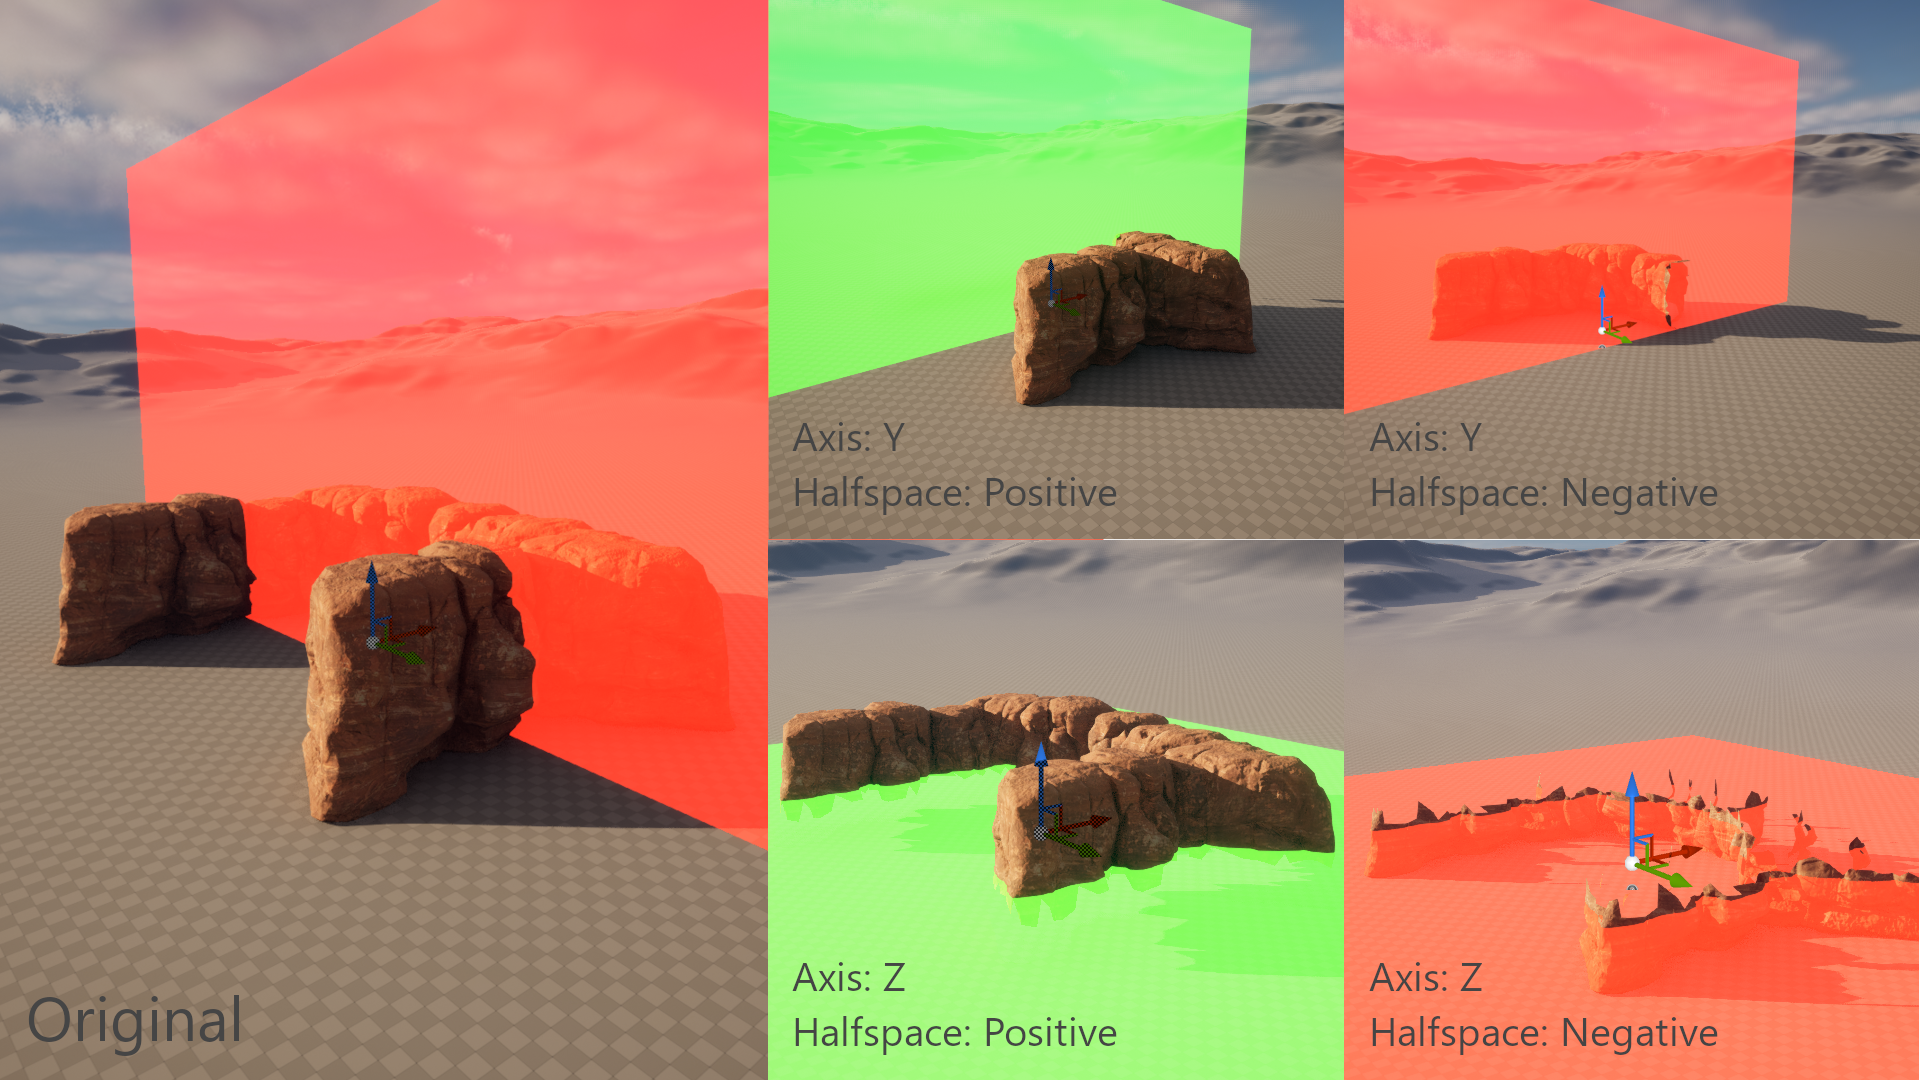
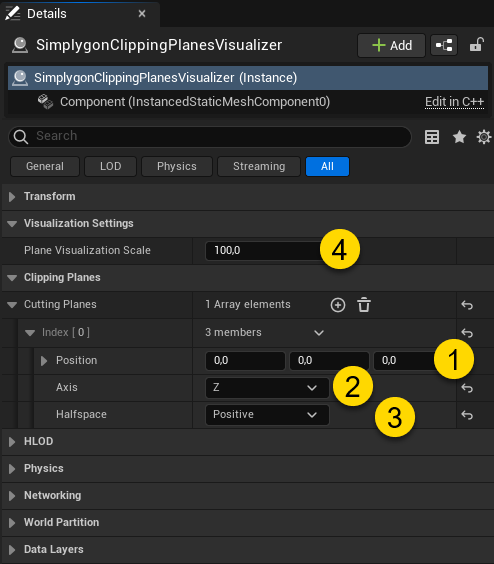
Editing a clipping plane is done in the details panel, see figure 3. You can set where in the world the plane should be located (1), which axis is should be aligned to (2) and which side of it should be culled away (3). The plane is visualized in the scene following the scale set in (4), but technically the clipping plane is unlimited when it is used in culling operations.
2. Set up your pipeline to use clipping planes
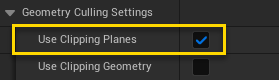
To make Simplygon aware of your clipping planes you need to enable "Use Clipping Planes", you can find it under "Geometry Culling Settings" for any Far- or Near Stand-In.
3. (Optional) Set up your pipeline to use culling
If you plan on using the clipping planes for culling, you might need to enable further settings.
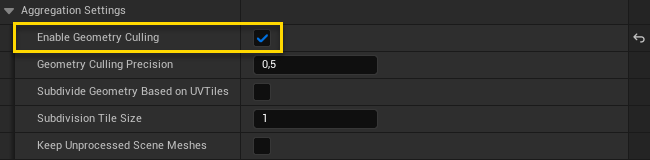
Near Pipeline
- Aggregation Settings → Enable Geometry Culling = true
Far Pipeline
- No extra settings needed.
Example using clipping planes for culling
Figure 6 shows a few culling examples showcasing what happens if you change the Axis and Halfspace settings.