LOD Recipe: Bone reduction
Enable the Bone Reducer to remove bone influence on vertices for LODs using a LOD Recipe.
Prerequisites:
- A LOD Recipe containing at least one Skeletal Mesh.
INFO
Bone Reduction is only supported for Reduction and Remeshing pipelines.
1. Enable Bone Reduction
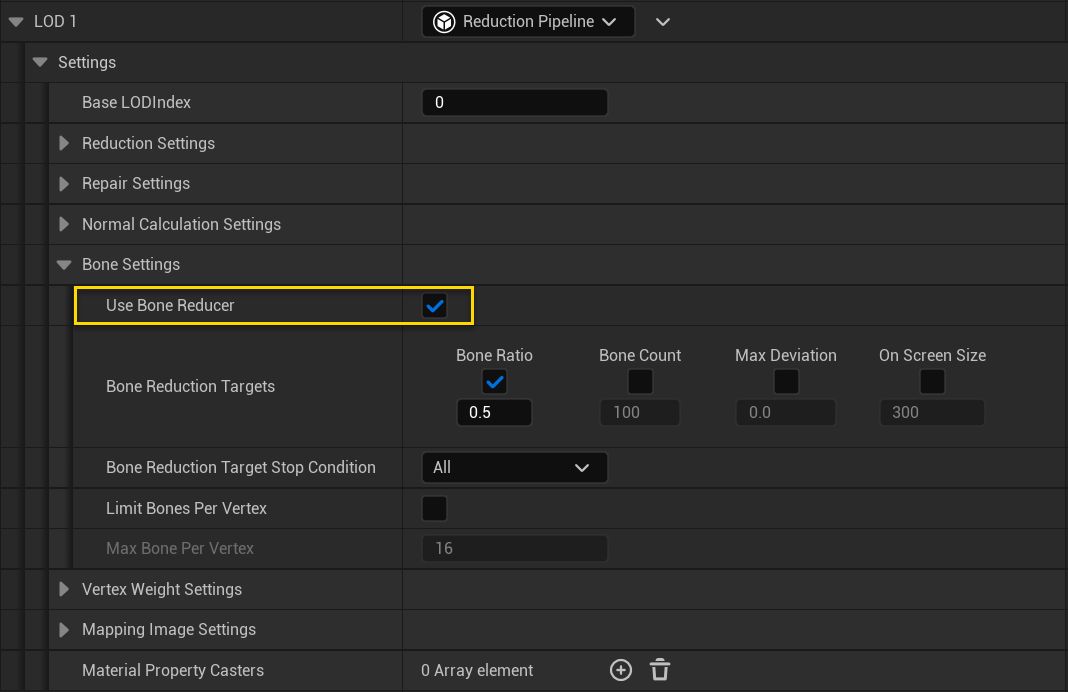
Inside the LOD Recipe, locate the Bone Settings for your LOD. You can find it under Settings → Bone Settings. Check the "Use Bone Reducer" checkbox to enable bone reduction.

2. (Optional) Change settings
The default settings will run a 50% reduction of bones. It will automatically figure out which bones that make the least visual difference and remove the influence of that bone on the vertices that is referencing it.
In this example we will set the following settings:
- LOD 1 (Reduction Pipeline):
- Use Bone Reducer: true
- Bone Reduction Target Bone Ratio: 0.4
- LOD 2 (Reduction Pipeline):
- Use Bone Reducer: true
- Bone Reduction Target Bone Ratio: 0.3
TIP
A first step to optimize your LODs using bone reduction could be to limit the amount of bones a vertex can reference. This will make the run-time calculations faster since there will be fewer transformations to make. The animation will look more rigid but no part of the mesh will become non-moving.
To do this, check "Limit Bones Per Vertex" and set the "Max Bone Per Vertex" to a low number. It's possible to combine this with the Bone Reduction Target settings but if you only want to limit the number of bones each vertex reference (and not remove any bones) you can uncheck all the Enabled flags of the Bone Reduction Targets.
3. Build
Once you're done setting all the LOD Recipe settings, press build and wait for the process to complete.
4. Result
Figure 2 shows the resulting LODs generated with the settings set in step 2. The Skeletal mesh is animated using a waving animation. It's possible to see that LOD 0 has full movement in its fingers while for:
- LOD 1: Finger bones are not used.
- LOD 2: The bones from the elbow to the finger tips are not used.

 Simplygon 10.3.5200.0