# Visibility / culling through cameras
Geometry that can't be seen from certain angles and geometry that is occluded can have an impact on performance, memory and disk space. Simplygon has the ability to optimize geometry and remove parts that aren't visible from certain points in space. If material baking is used in combination with visibility Simplygon can decide how much texture space is needed based on the level of visibility. Unused texture space from culled triangles will allow higher texture density for the ones that remain.
This section goes through how to prepare a scene for the Visibility feature. The visibility feature require the user to setup one or more cameras, assign them to a selection-set and then select the set in the Simplygon UI.
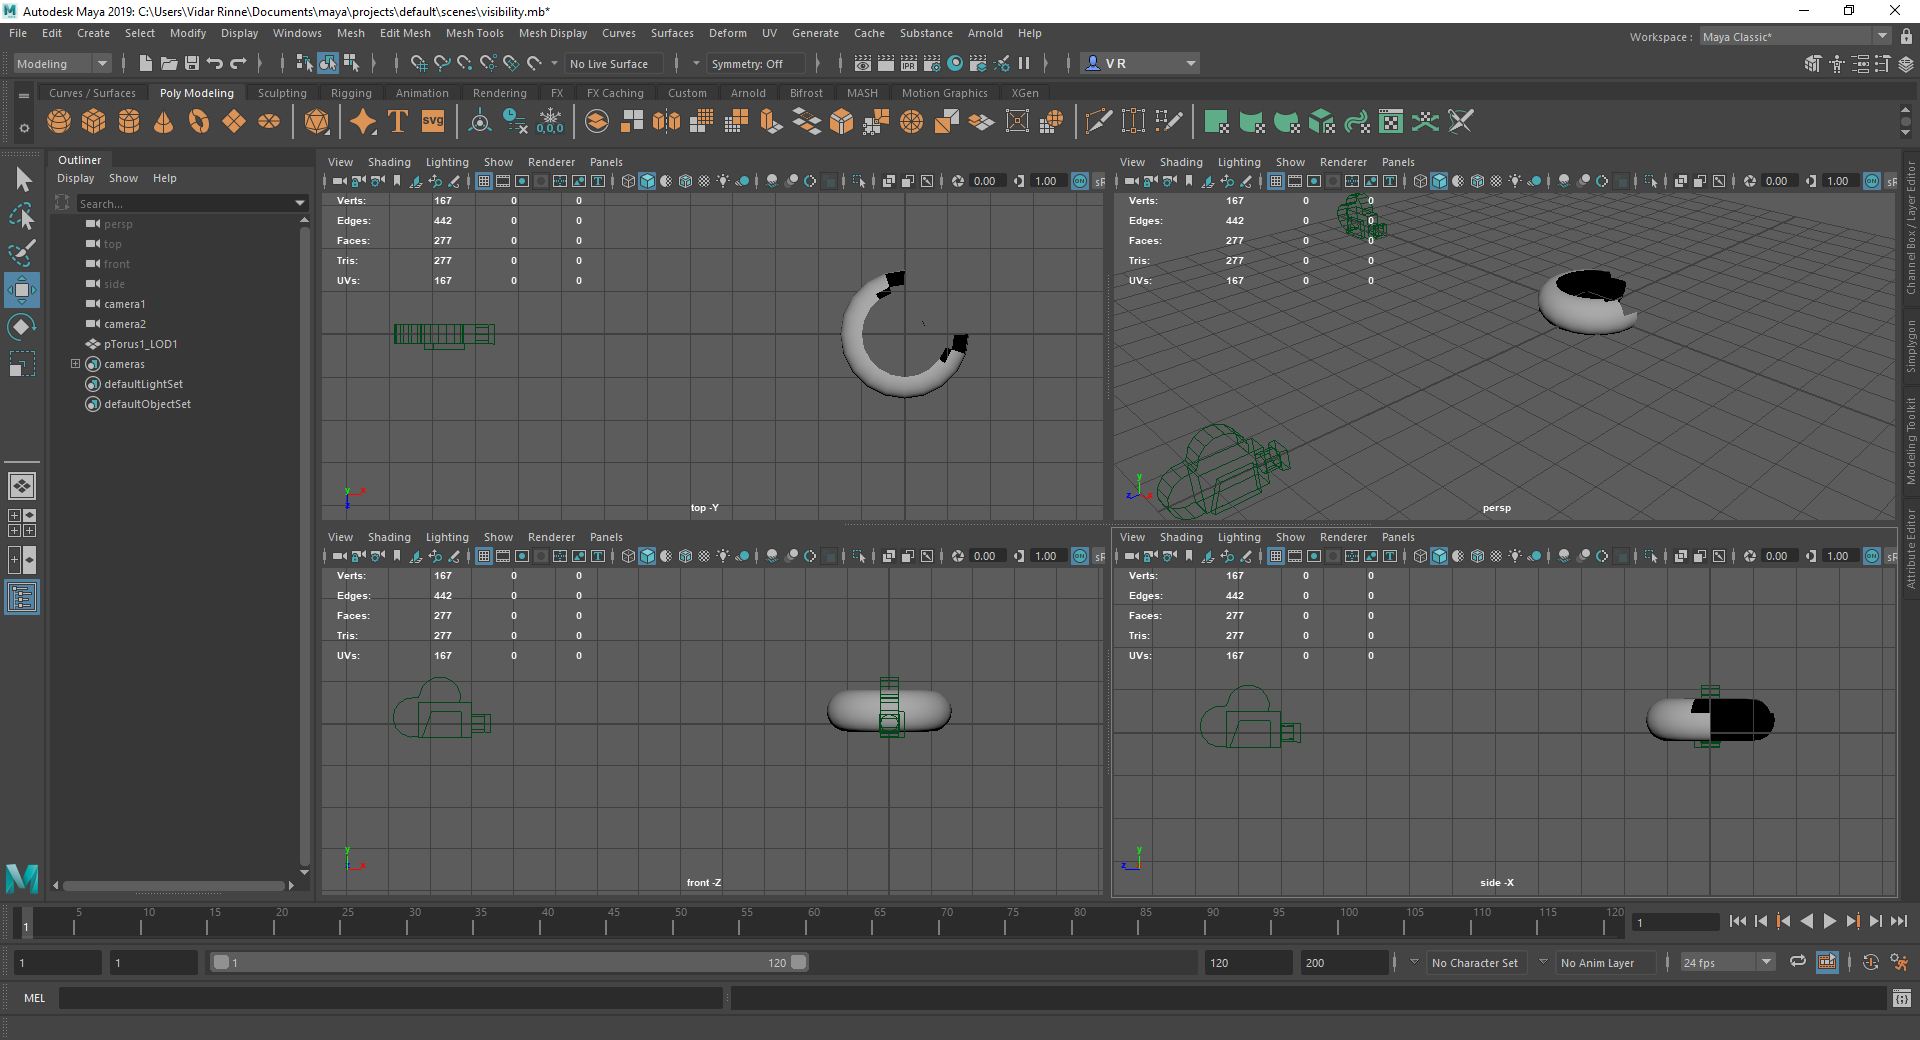
The expected result is an asset that is visible from two cameras, with occluded and backfacing areas removed.
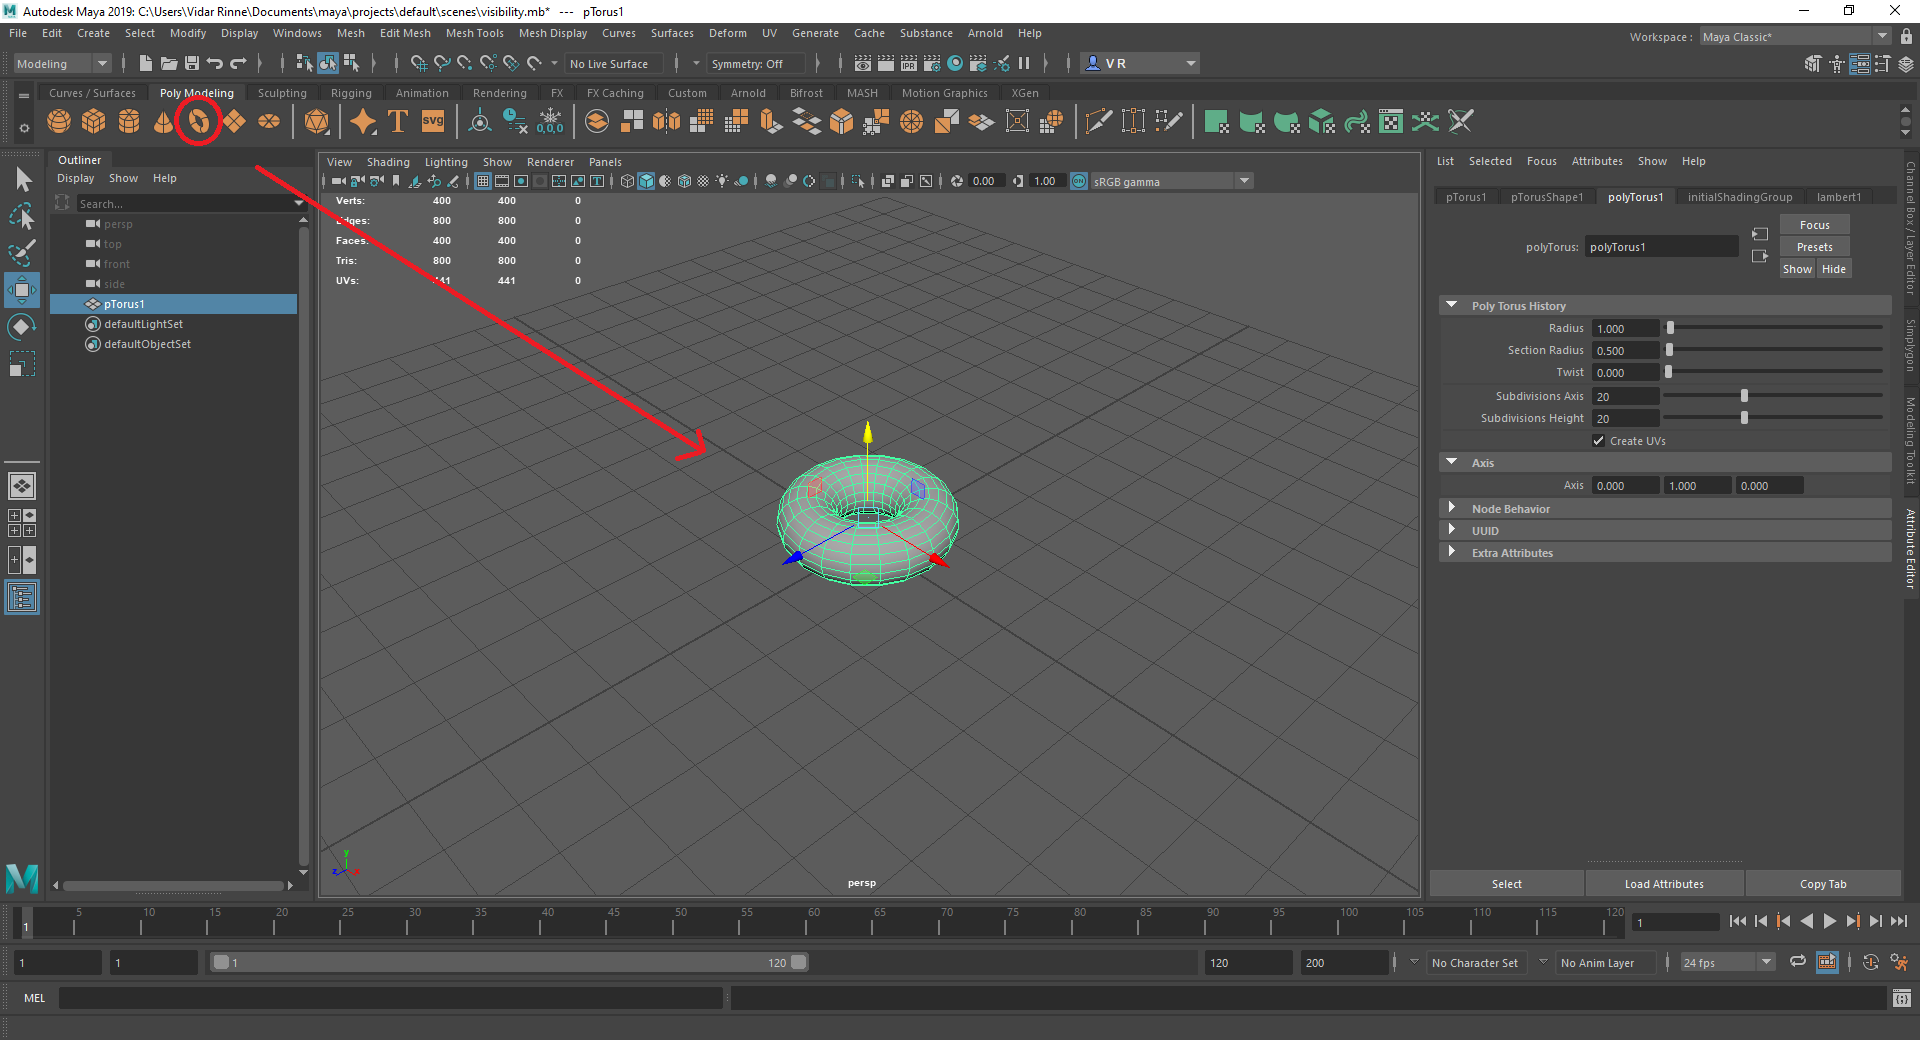
The first step is to create an asset, in this example we'll use a torus (you may use any asset you prefer). Select the torus in the toolbar (Poly Modeling -> Torus) and place it in the center of the scene just on top of the grid (use 'w' key and adjust the position).
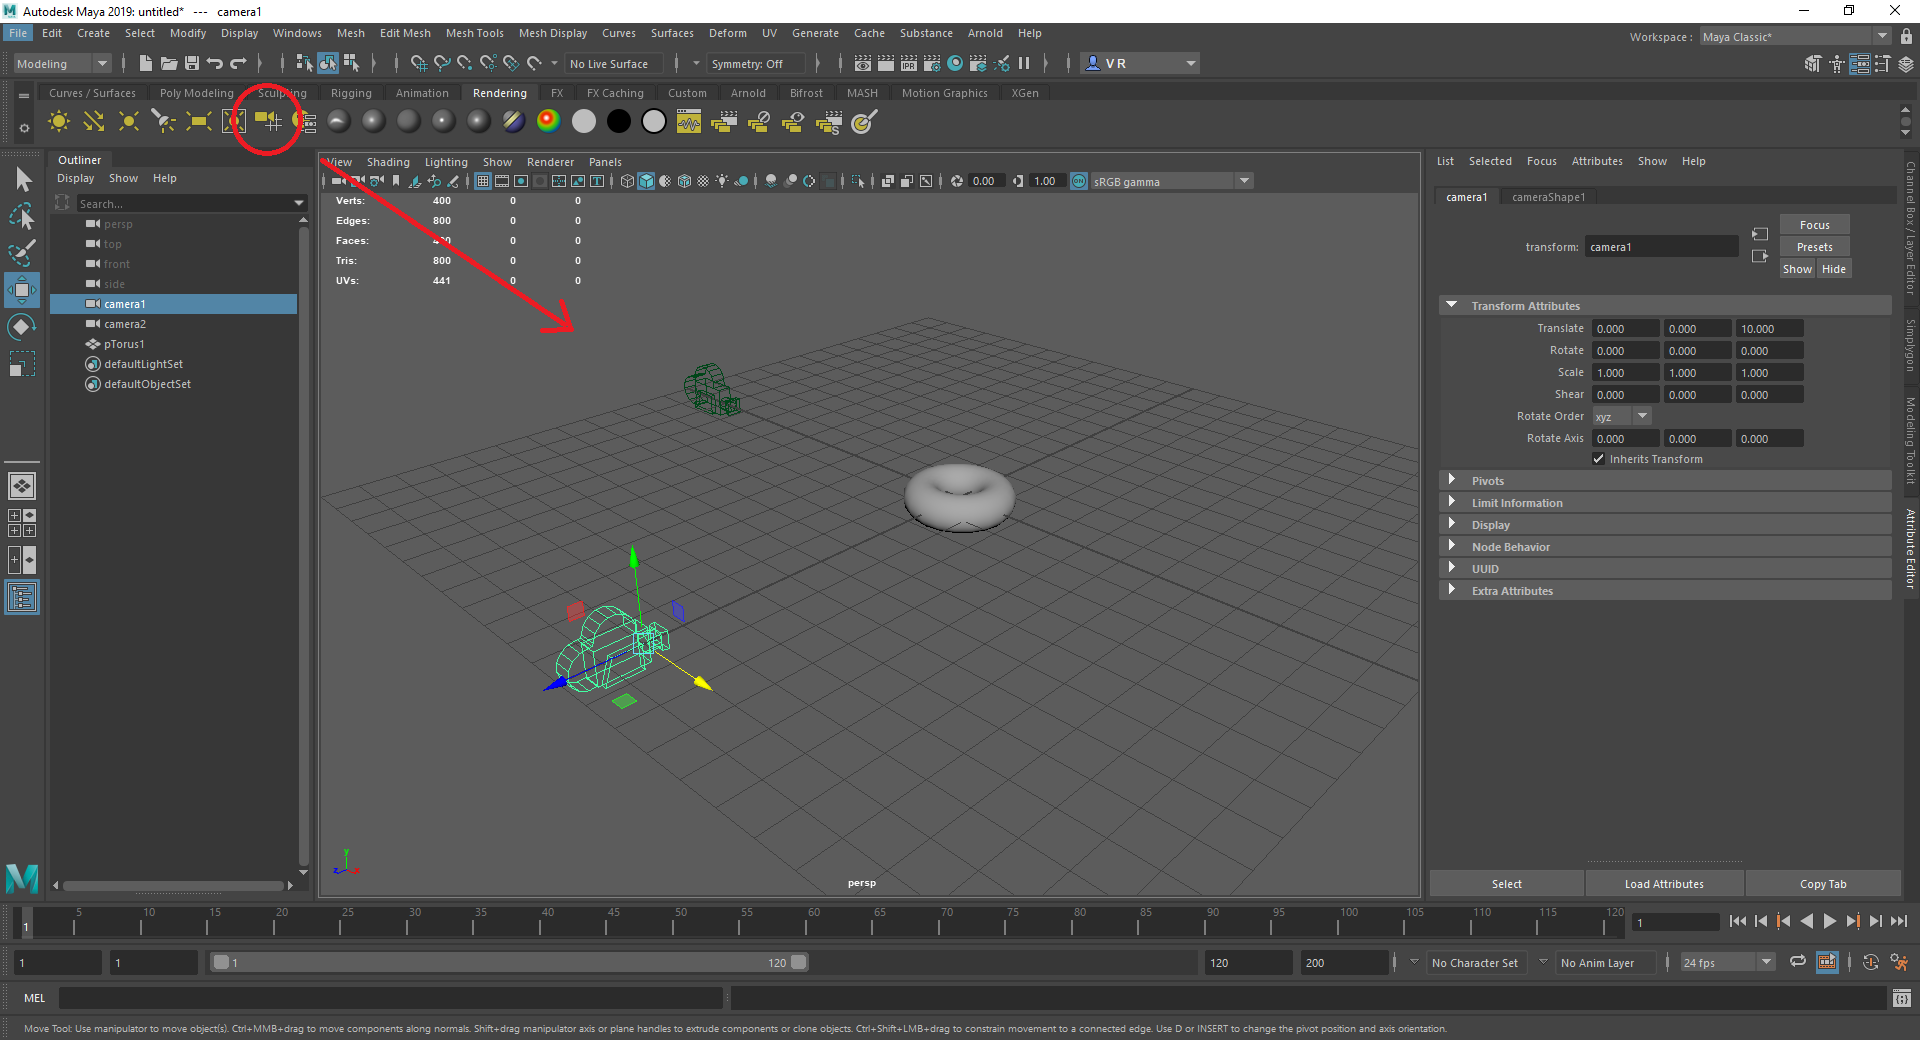
The second step is to place two cameras (Rendering -> Camera), in this case along the negative x-axis and in the negative z-axis and again just on top of the grid. If you are using another asset you may need to adjust the position of the cameras so that they clearly see the asset. Clicking on a camera usually displays the frustum which can be used to position the cameras correctly, if the frustum is not visible it can be enabled in the camera's Display Options.
Note: For visibility Simplygon reads camera properties such as direction, field of view, orthographic / perspective as well as transformation. Target cameras will use the vector between camera and target as view direction, the length will not affect the result.
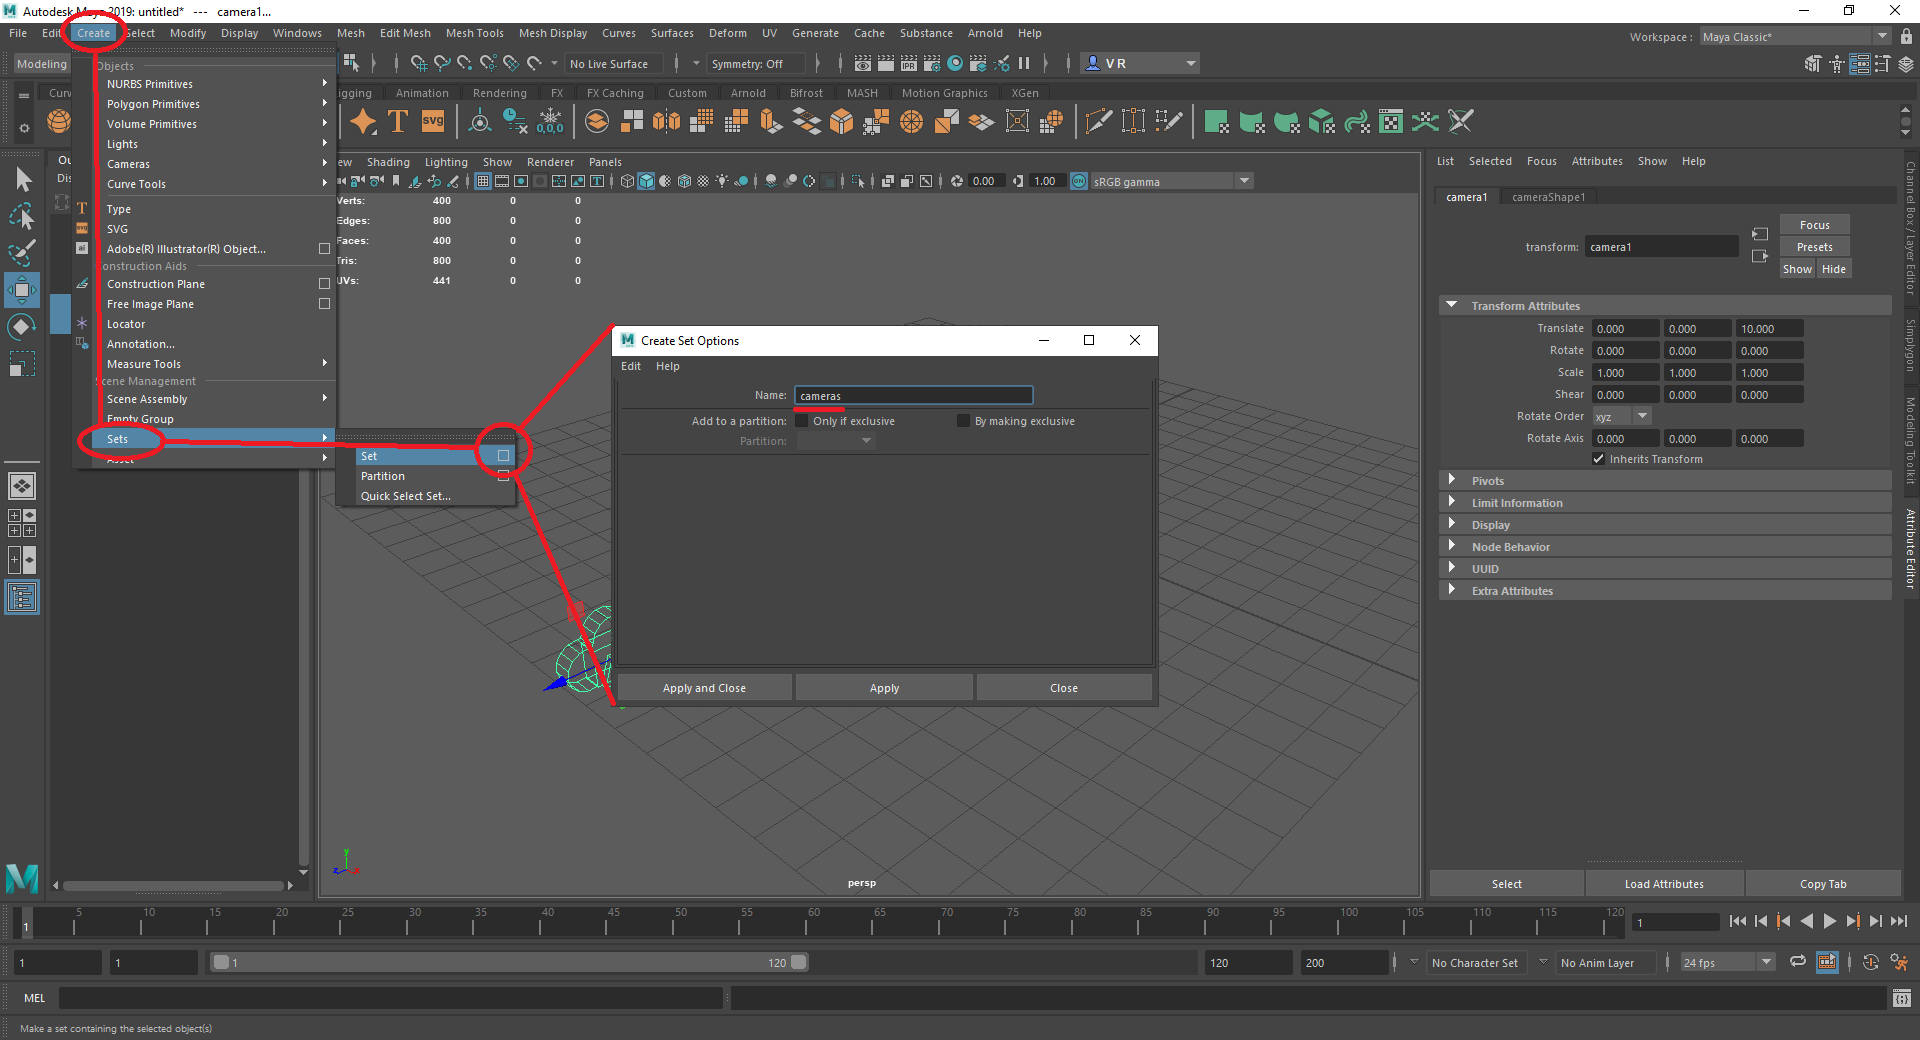
The third step is to create a selection-set with these two cameras, go ahead and select the two cameras, then go to the main menu and select Create -> Sets -> Set (square button). In the new window, name the set "cameras" and then apply and close. The selection-set should now be visible in the Outliner, containing the two cameras.
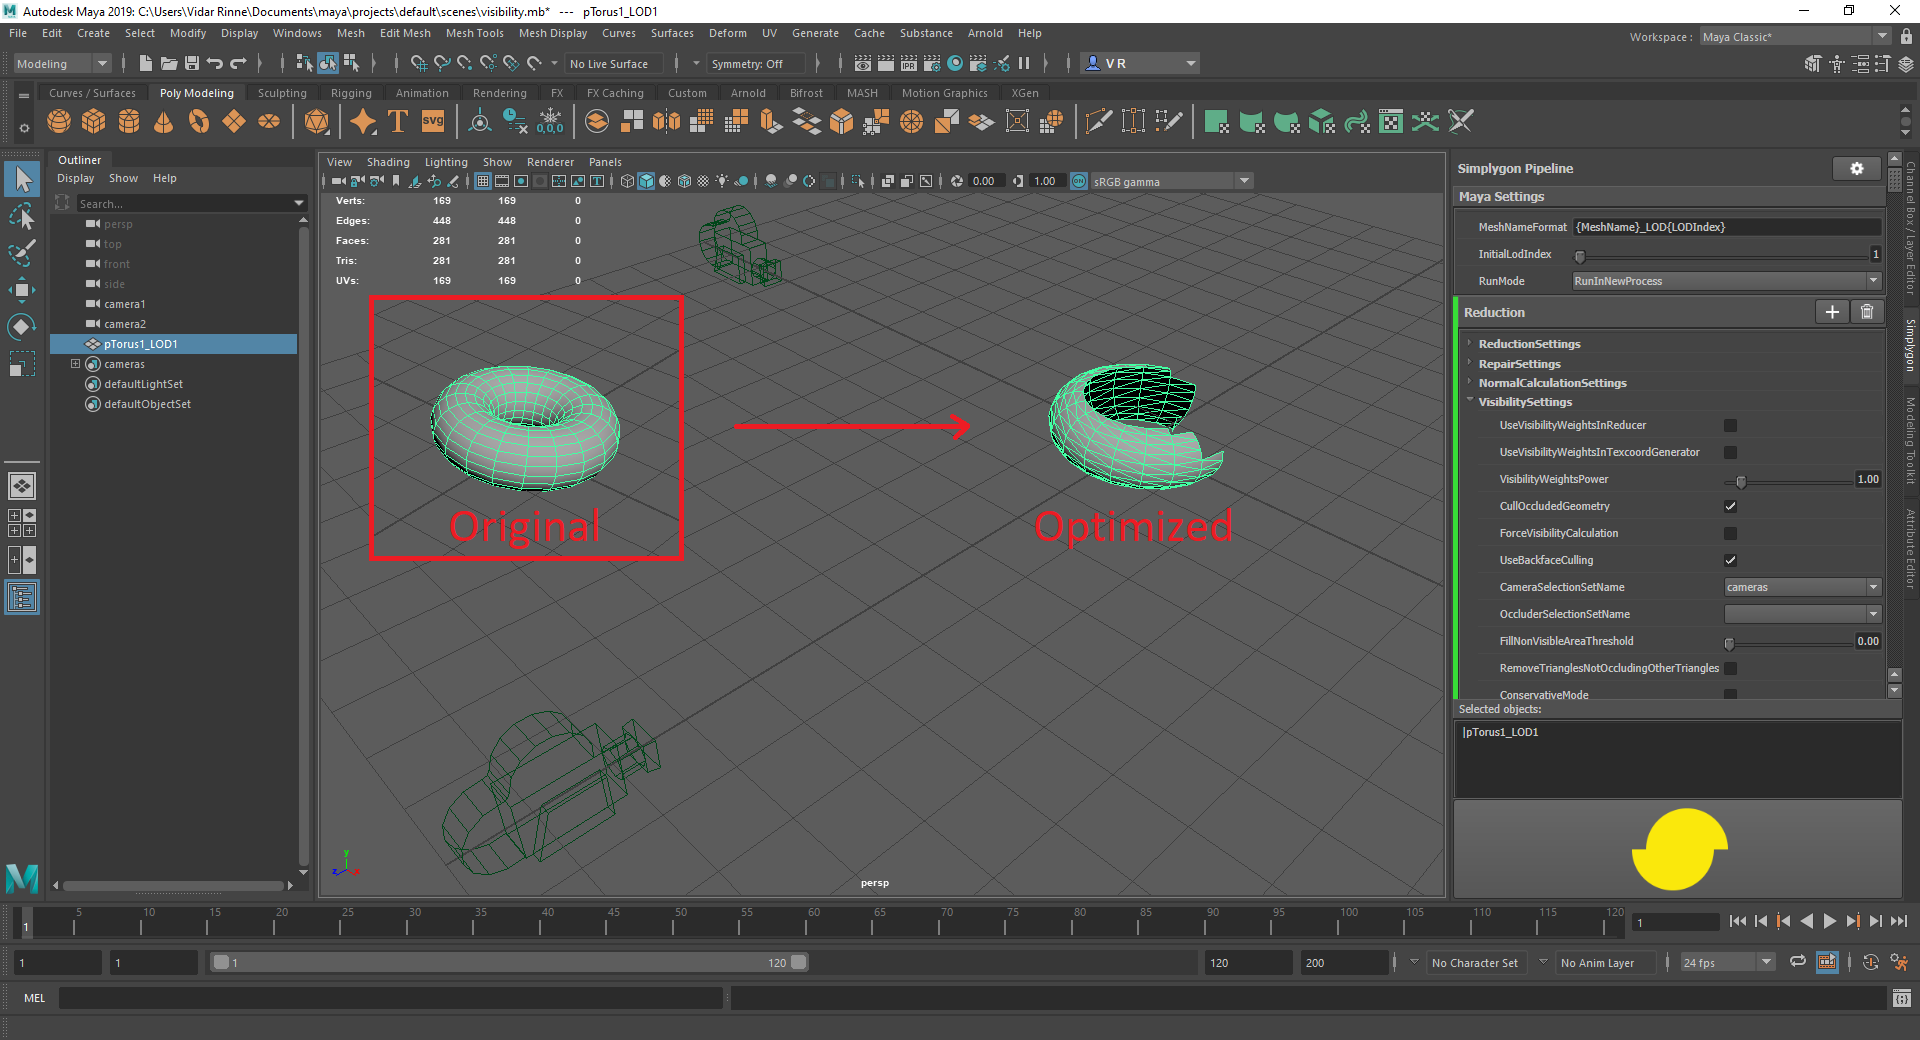
The fourth step is to let Simplygon know which camera set to use, let's create a Basic Reduction Pipeline. If Simplygon is not visible, click on Simplygon located at the rightmost vertical edge.
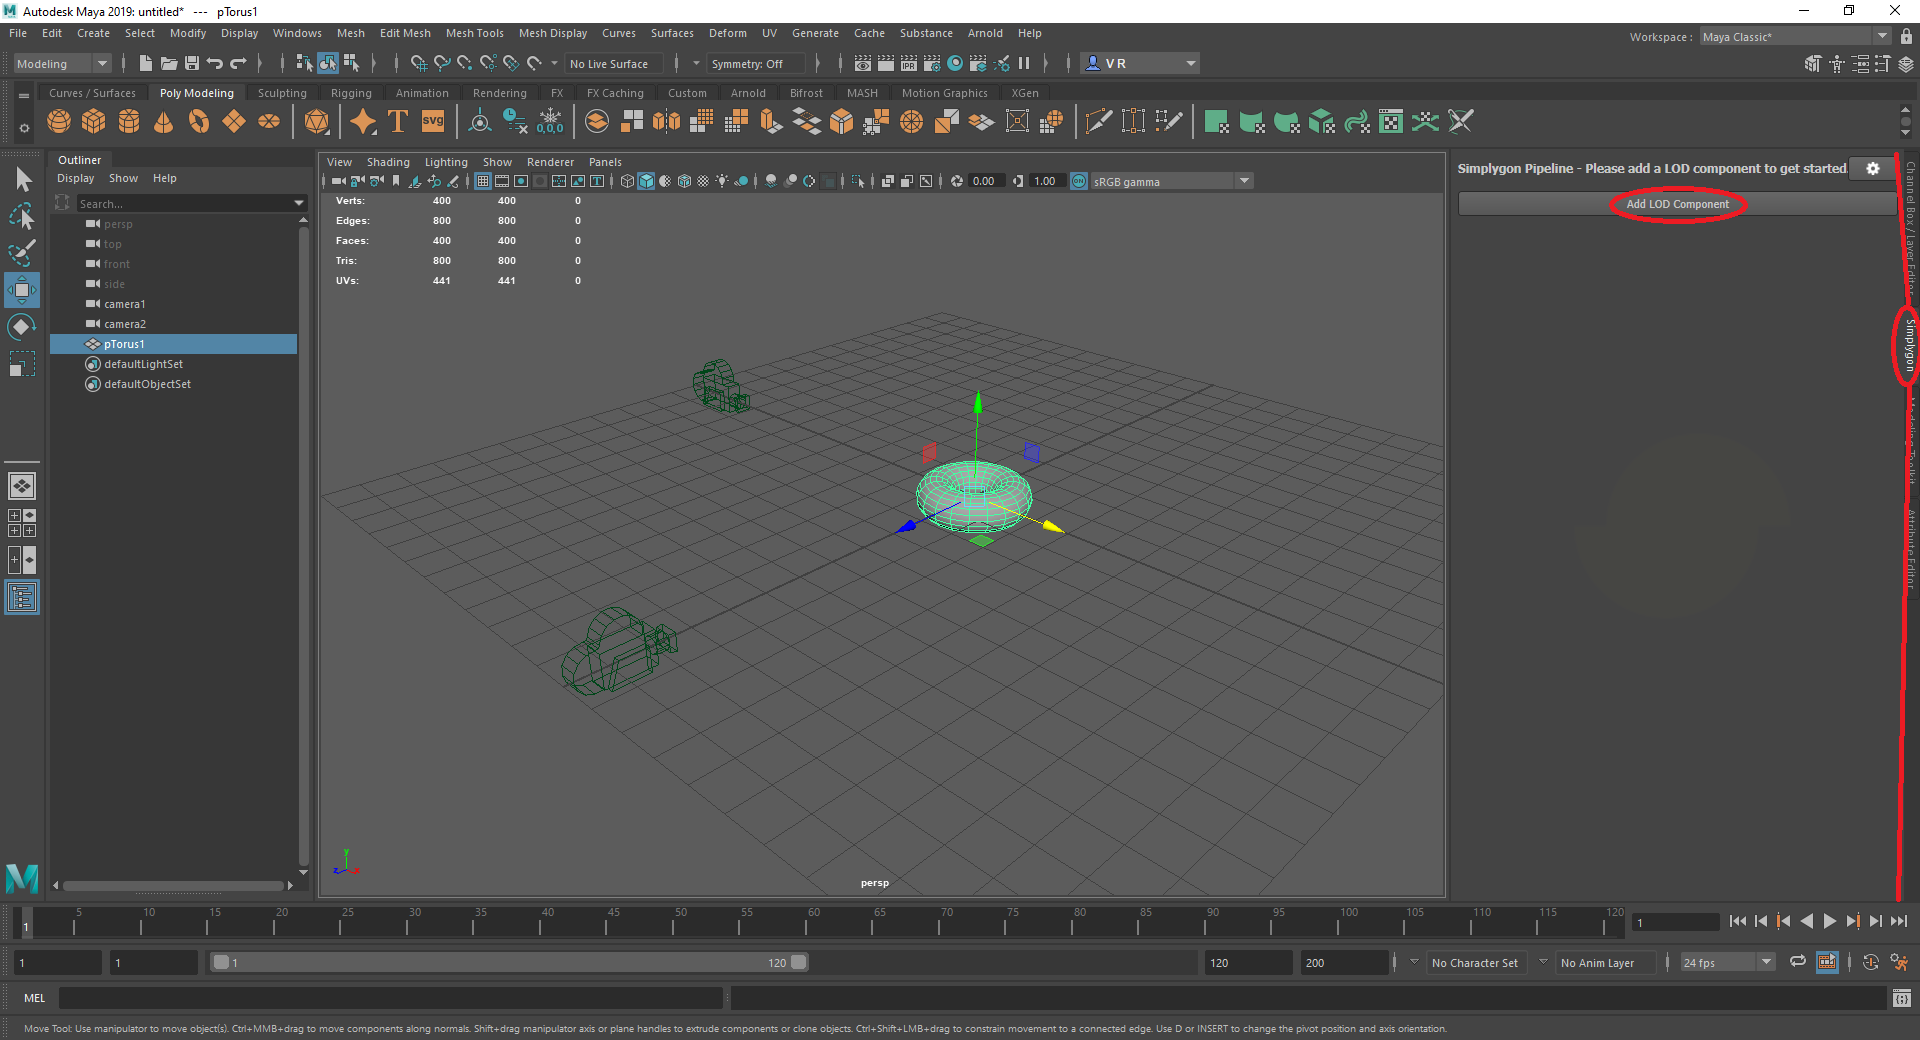
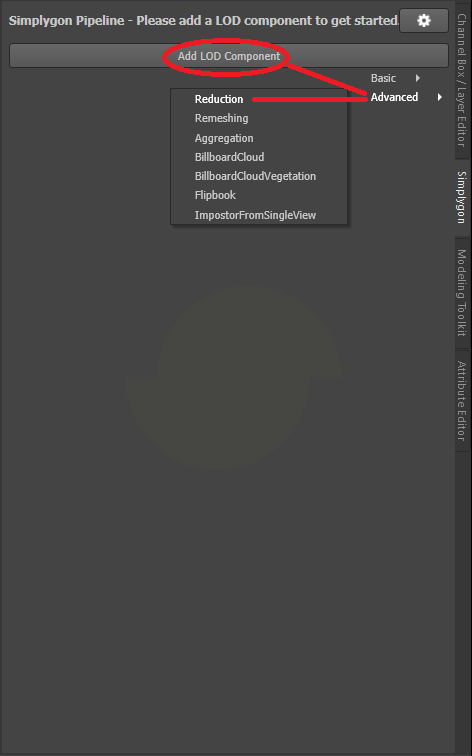
Click on Add LOD Component -> Advanced -> Reduction to create a Reduction Pipeline. The reduction ratio is by default set to 0.5 (50%) so let's go with that in this tutorial. Now expand VisibilitySettings and check UseBackfaceCulling and CullOccludedGeometry, and in the CameraSelectionSetName dropdown, choose the selection-set named "cameras".

The fifth and final step, select the asset in the Viewport or Outliner, then press the yellow Simplygon icon in the Simplygon UI to start the optimization. When the optimization has completed the result will be returned to Maya.