LOD Recipe: Select bones to remove
Manually select which bones to remove for LODs using a LOD Recipe.
Prerequisites:
- A LOD Recipe containing at least one Skeletal Mesh.
INFO
Selecting bones to remove is only supported for Reduction and Remeshing pipelines.
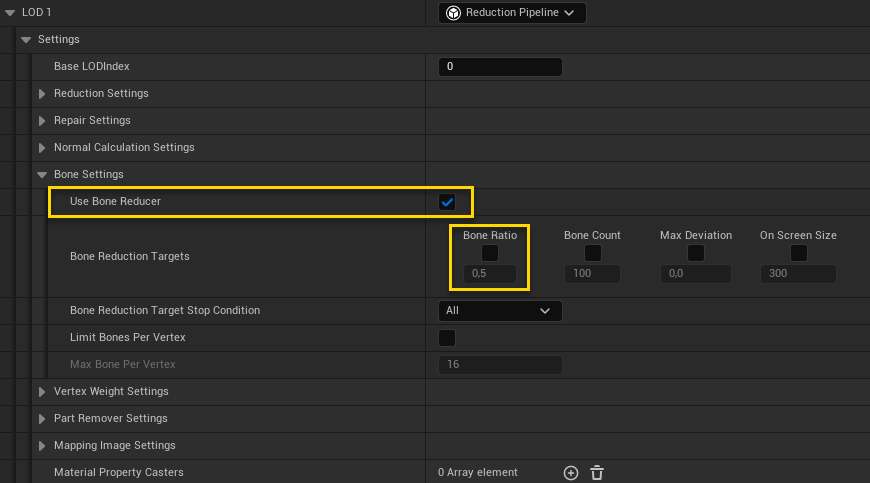
1. Enable Bone Reducer
Inside the LOD Recipe, locate the Bone Settings for your LOD. You can find it under Settings → Bone Settings. Check the Use Bone Reducer checkbox to enable bone reduction. In this example we only want to remove selected bones, therefor we'll also disable all bone reduction targets to not remove bones automatically.
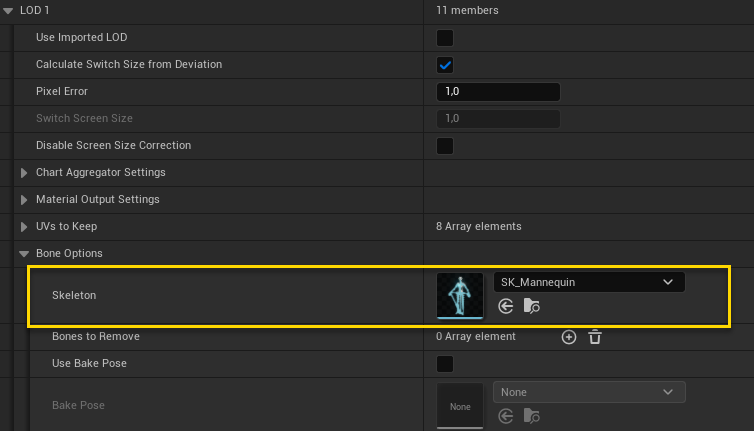
2. Select target skeleton
In the LOD Recipe, go to Miscellaneous Settings → Bone Options. Select the skeleton that will serve as the target for bone removal. This skeleton must share the same skeleton with all skeletal meshes in the LOD Recipe.
3. Select Bones to Remove
Add the number of slots corresponding to the number of bones you want to remove in the Bones to Remove list. Then, assign a bone to each slot you created.

4. (Optional) Enable Bake Pose
Combine bone removal with a Bake Pose.
Enable Use Bake Pose in Bone Options and select an animation sequence in the Bake Pose property row. The skeleton must be valid, and the animation should match it. This helps preserve a specific pose when generating the LOD.
5. Build
Once you're done setting all the LOD Recipe settings, press build and wait for the process to complete.
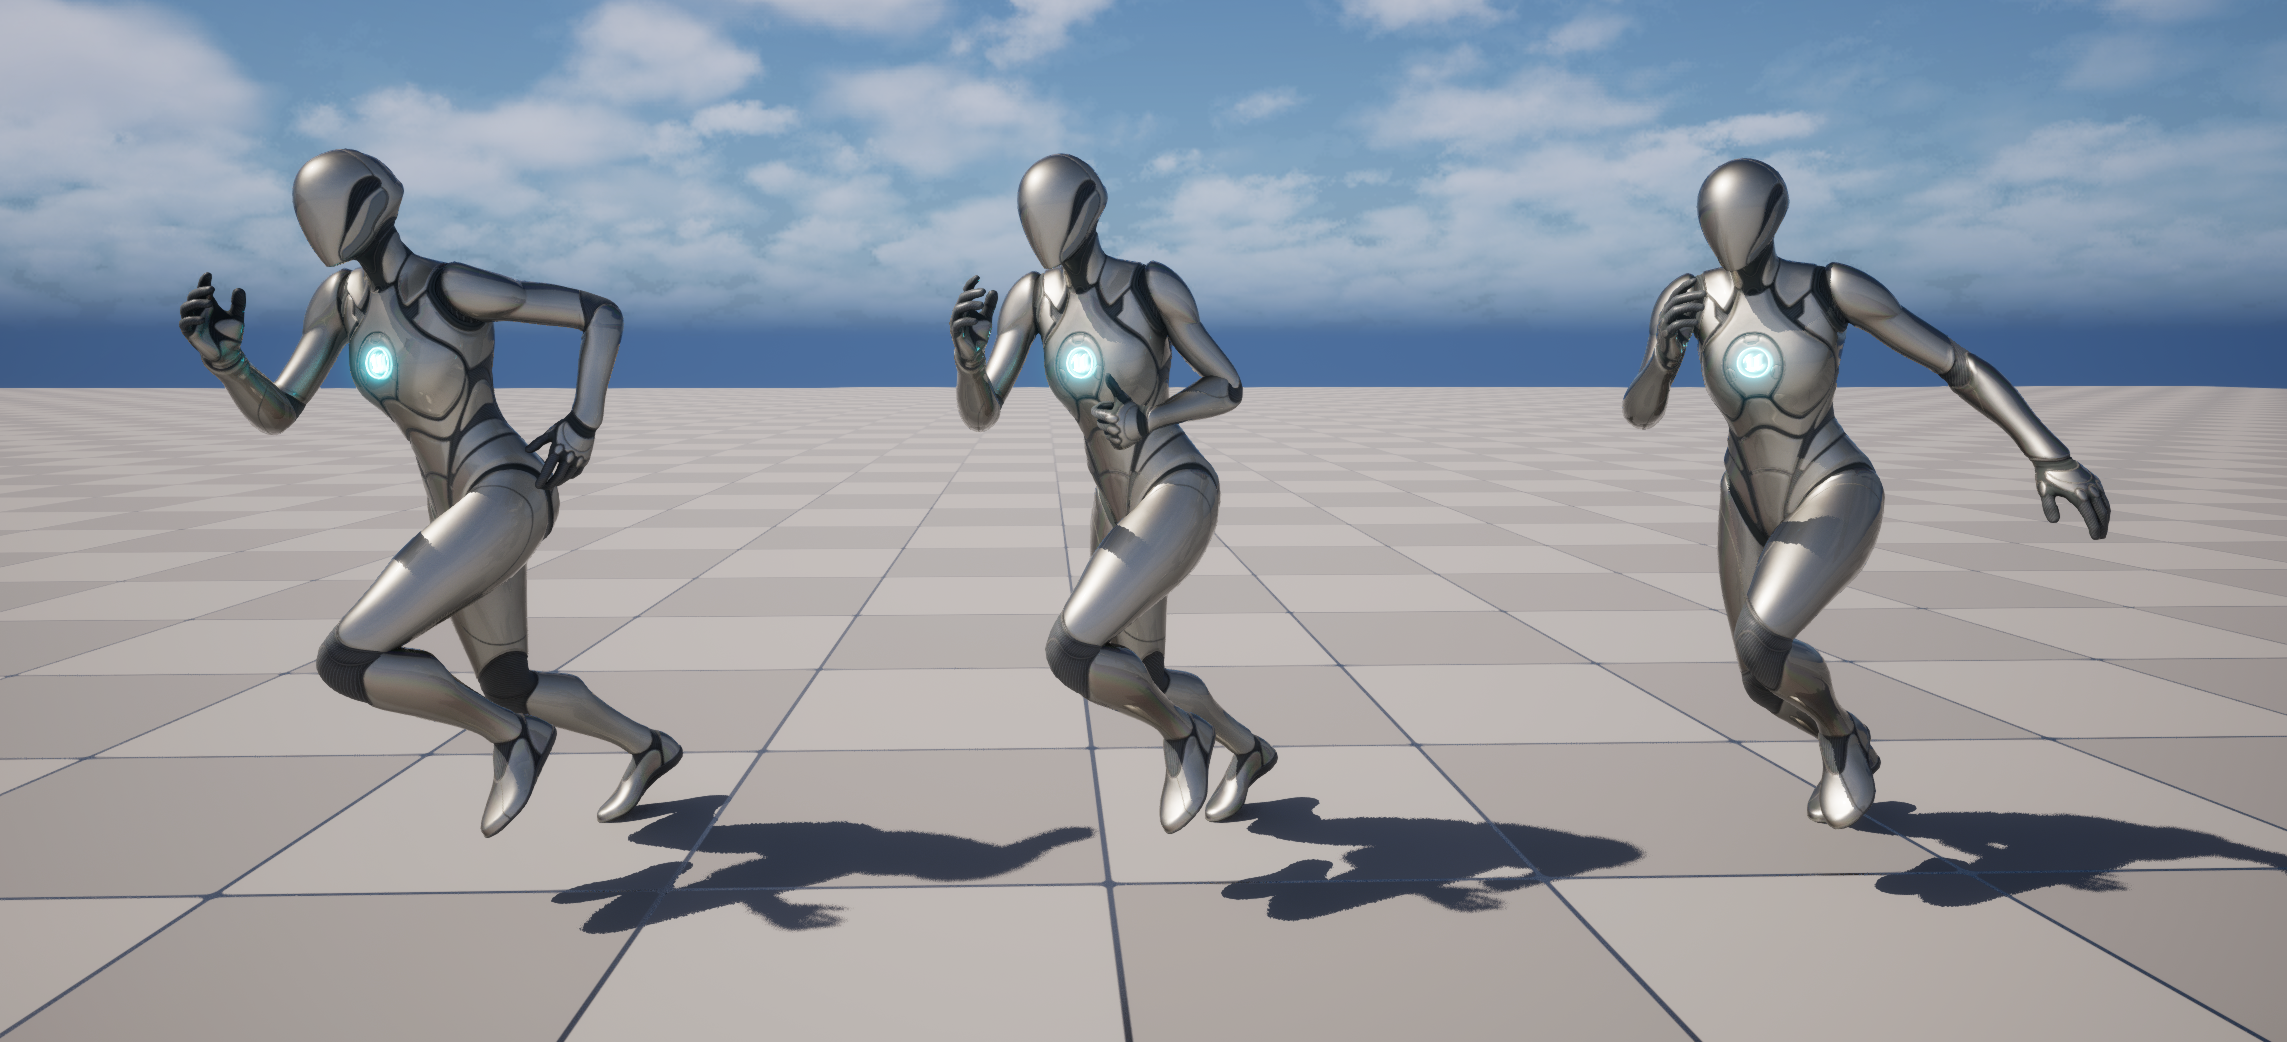
6. Result
Figure 4. shows the result after removing the upper left arm bone. Left LOD is the original LOD 0. Middle and right has removed the upper left arm, the difference is that the middle also has a bake pose applied to it.