HLOD: Landscape culling
Use Landscape Culling to remove parts of the simplified HLOD mesh that is located underneath the surface. In Simplygon we refer to this as Geometry Culling. There are several conditions that need to be met for landscape culling to work with Simplygon, see the steps below.
Important
Simplygon will not optimize the Landscape geometry itself; if the Landscape geometry is assigned to an HLOD layer then that work will get delegated to Unreal Engine's built-in Landscape optimizer. The Landscape geometry gets exported as clipping geometry if the following conditions are met:
- Use SimplygonWorldPartitionBuilder as builder in WorldPartitionBuilderCommandlet
- The Simplygon HLOD builder supports Landscape Culling
- The Simplygon HLOD builder has Geometry Clipping enabled
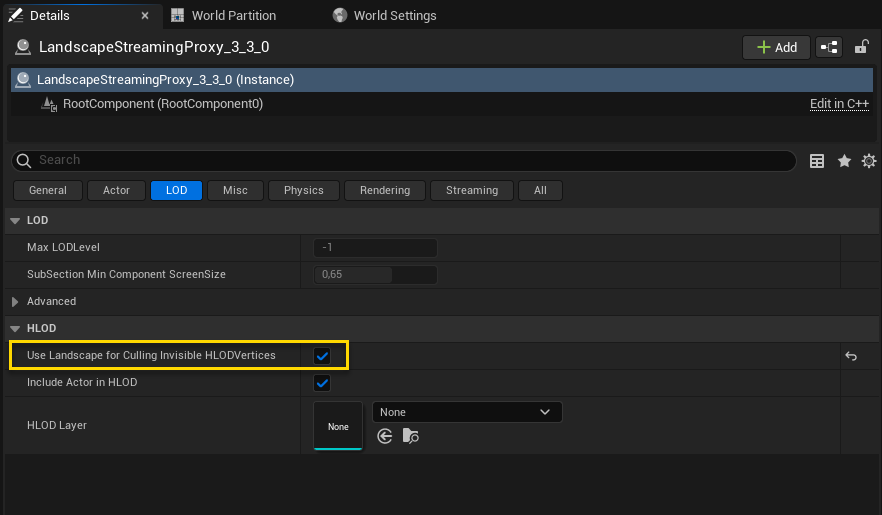
- The Landscape and LandscapeStreamingProxy have "Use Landscape for Culling Invisible HLODVertices" enabled
1. Enable landscape as a culling geometry
Find the Landscape Actor(s) in the World Outliner. In the details panel, check "Use Landscape for Culling Invisible HLODVertices".
Important
If you use LandscapeStreamingProxy Actors you need to set this setting on all the Proxy Actors, not just the Landscape Actor.
2. Enable Geometry Clipping in HLOD builder settings
Find the HLOD Layer that contains the Simplygon HLOD builder of which we want to enable landscape culling for.
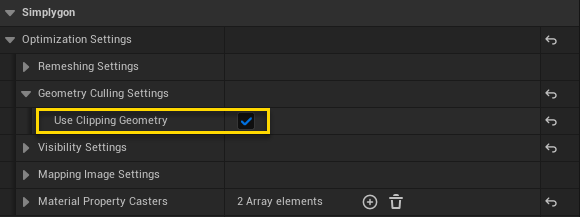
If the clipping feature is supported it should be located in HLOD Layer -> Simplygon -> Optimization Settings -> Geometry Culling Settings -> Use Clipping Geometry. Set "Use Clipping Geometry" to true and save the HLOD layer.
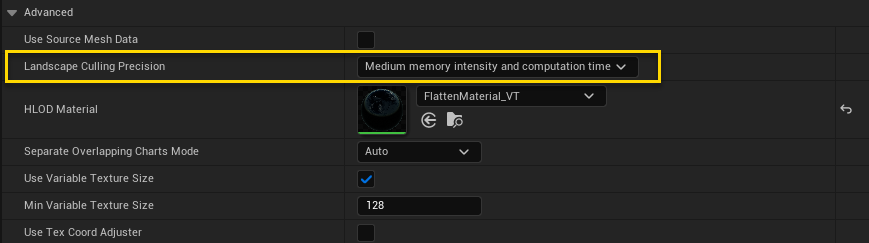
3. [Optional] Adjust Landscape Culling Precision
The landscape geometry can be exported using different precision options. This can be achieved by changing Landscape Culling Precision under the Advanced section. The default value is Medium; for tighter clipping (for close up HLODs) this setting can be set to High. Memory footprint and number of computations will increase drastically; use with caution!
4. Build HLODs
Open a terminal and locate the UnrealEditor-Cmd.exe in your Engine folder, e.g. C:\Program Files\Epic Games\UE_{engine version}\Engine\Binaries\Win64\UnrealEditor-Cmd.exe.
Run the following command, replace {ProjectPath} with the path to your project file (uproject), and {MapPath} with the path to the level (umap).
.\UnrealEditor-Cmd.exe {ProjectPath} {MapPath}
-run=WorldPartitionBuilderCommandlet
-Builder=SimplygonWorldPartitionBuilder
-AllowCommandletRendering
Wait for the process to finish.
5. Result
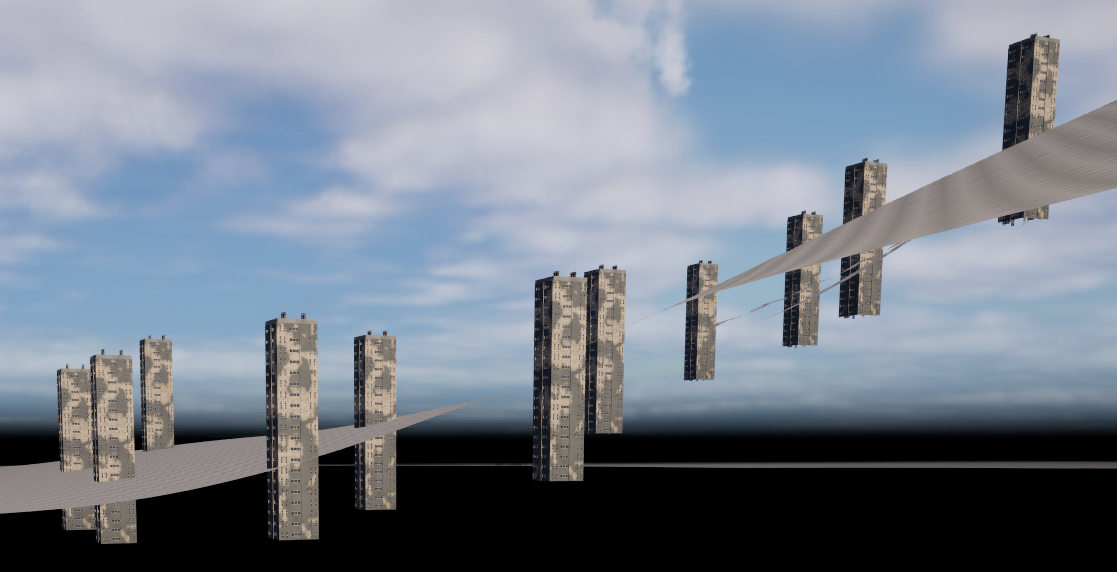
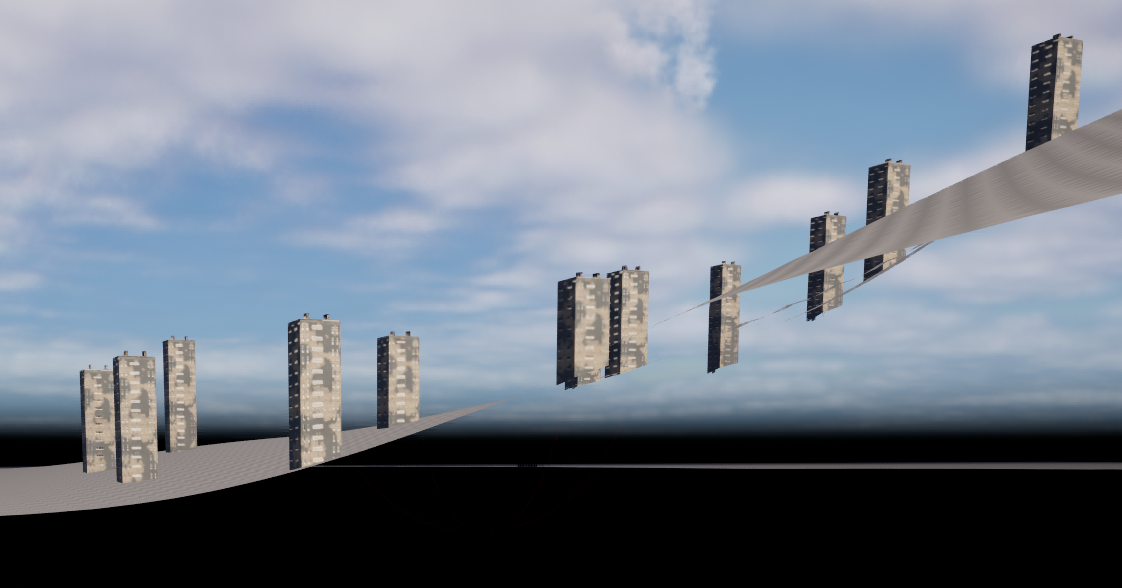
The following images show pre- and post HLOD generation with landscape culling enabled.