# Preserve morph targets through Simplygon
The Simplygon Max plug-in preserves morph targets that are connected to the Morpher modifier. The Simplygon plug-in utilizes the script interface of the Morpher modifier and supports most of the common functionality.
These examples will go through how to setup a Morpher modifier (including morph channels) for one morph target per morph channel as well as multiple morph targets per morph channel (progressive).
Please read requirements and supported functionality before proceeding with the examples!
# Requirements
There are four requirements that has to be fulfilled for morph targets to get "transferred" to the optimized geometry, the first is that the Morpher modifier for the given mesh has to be enabled, the second is that the morph channel has to be enabled, the third is that the morph channel contains valid data, and the last requirement is that the optimization method has to be Reduction (Aggregation and Remeshing are not supported). If these conditions are not fulfilled the Morpher and / or deselected / invalid morpher channels will be ignored.
"Transfer" morph targets may not be the correct term for describing this behavior, what Simplygon does in this case is adding an extra vertex field (one for each morph target) and stores it in the geometry. The vertex field gets reduced (optimized) with the rest of the mesh data, and then when importing the optimized geometry back in th e Max we Simply write back these extra (optimized) vertex fields. So in short Simplygon will generate new morph targets for all optimized geometries that have morph targets attached to it.
Important information
- Reduction is the only optimization method that can preserve morph targets, Aggregation and Remeshing are not supported!
- Morph target quality may vary depending on target triangle count, importance- and welding settings.
- See troubleshoot for known / common issues.
# Supported functionality
Supported Morph target functionality:
- One morph target per morph channel
- Multiple morph targets per morph channel (Progressive)
- One 'Captured' morph target per morph channel (limited by Morpher script functions)
Transfer of global Morpher settings:
- Use Limits
- Minimum / Maximum Limit
- Use Vertex Selection (setting only)
Transfer of per-channel Morpher settings:
- Use Limits
- Minimum / Maximum Limit
- Weight (morph channel weight)
- Target % (for progressive targets)
- Tension
- Use Vertex Selection (setting only)
# Examples
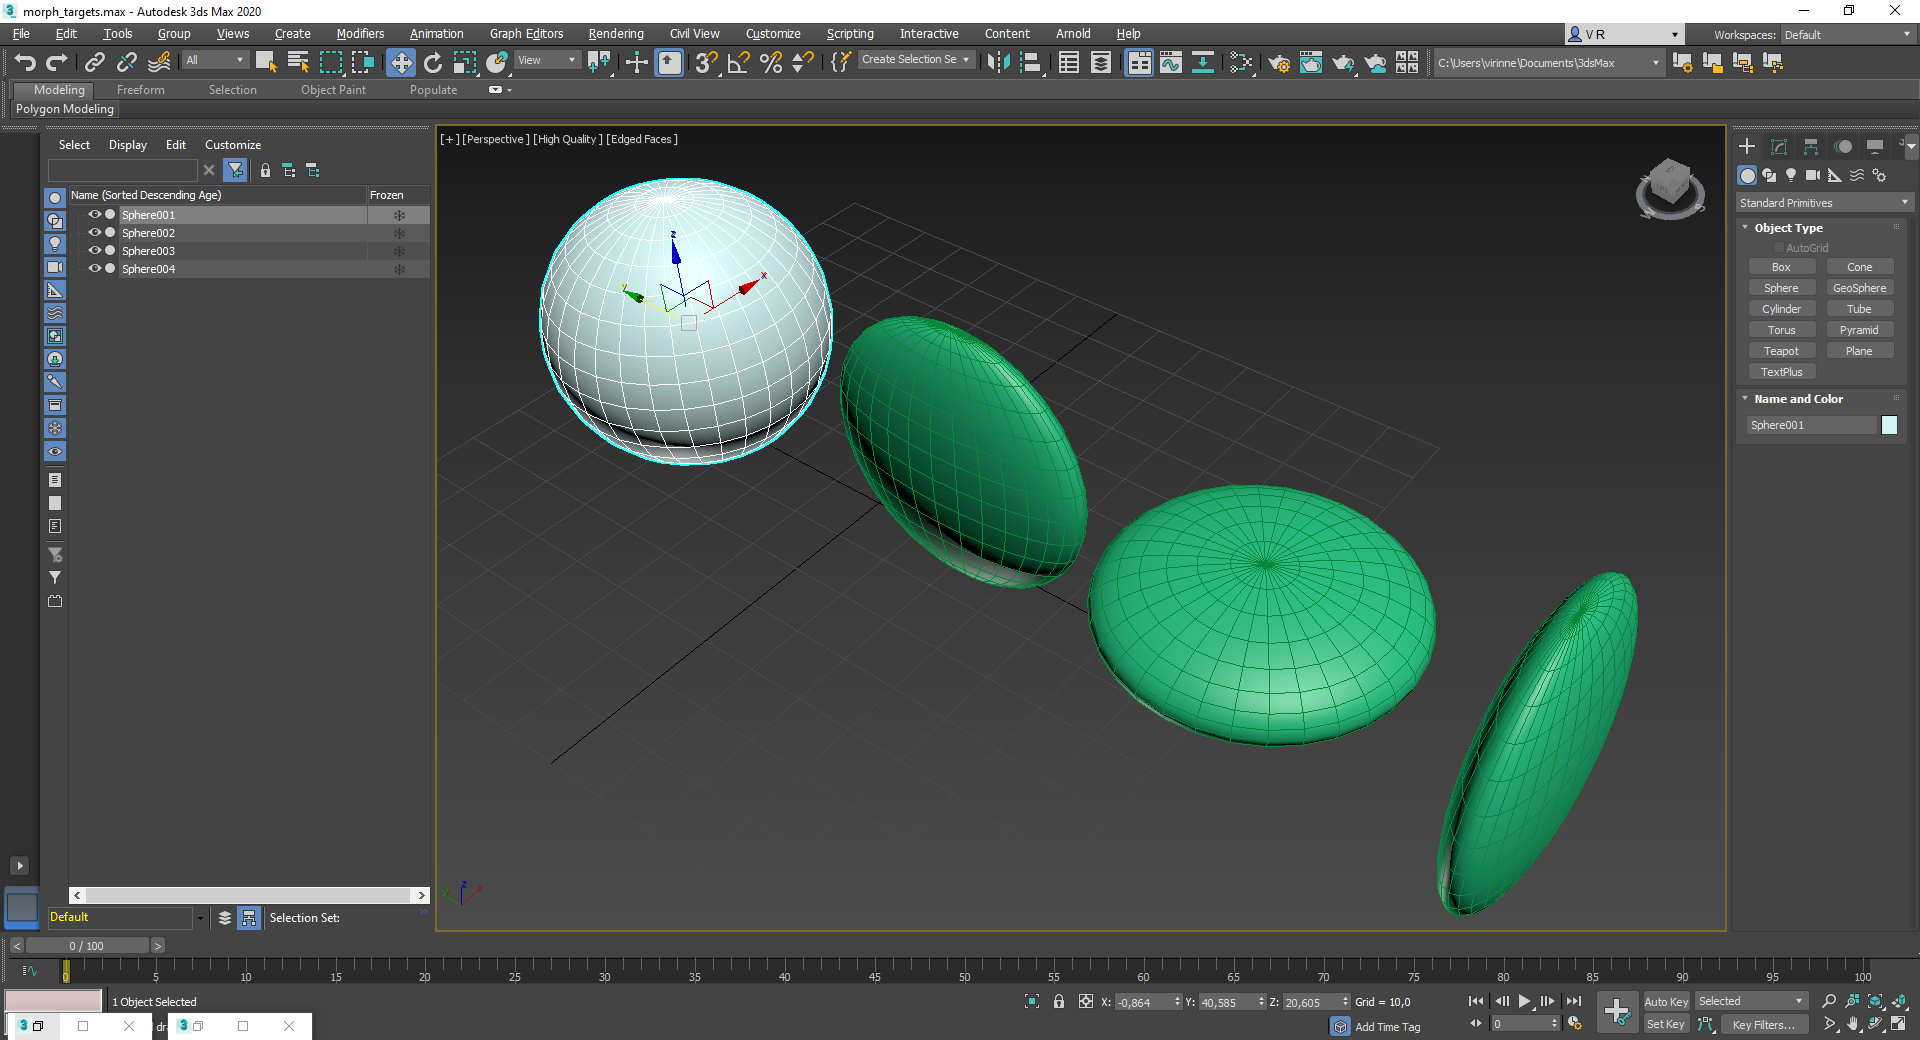
To quickly demonstrate how morph targets works in 3ds Max we've prepared a small scene which contains four spheres. The first (white) sphere is left untouched as it soon will be the asset that deforms. The three green spheres have been scaled in various ways and will soon act as morph targets for the first sphere. Keep in mind that it is the vertex positions that are important here, some object transformations may not affect the vertex positions. Editing vertex positions through Editable Mesh will most likely stick!
Let's create these four spheres and deform three of them so that they have unique shapes (through modifying vertex positions).
# One morph target per morph channel
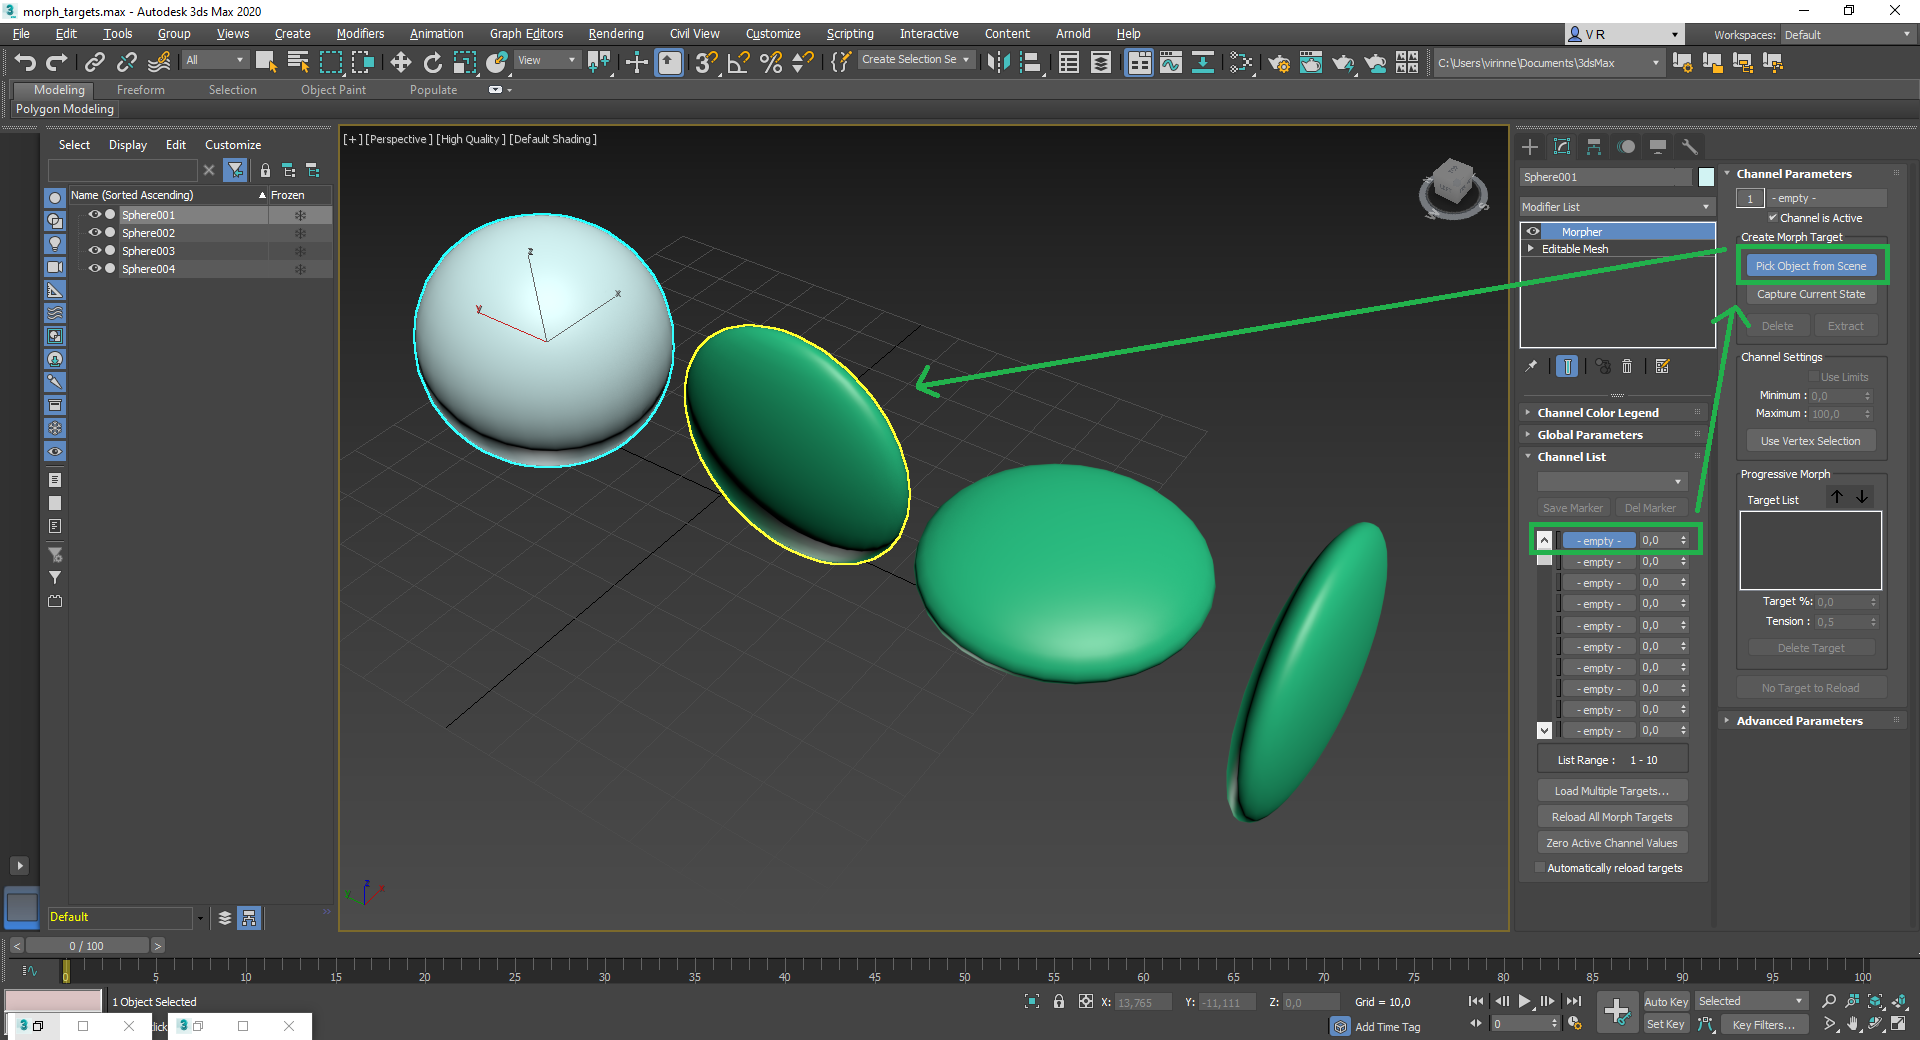
Let's add a Morpher modifier to the mesh you wish to morph, we'll use 'Sphere001' (white) throughout this example.

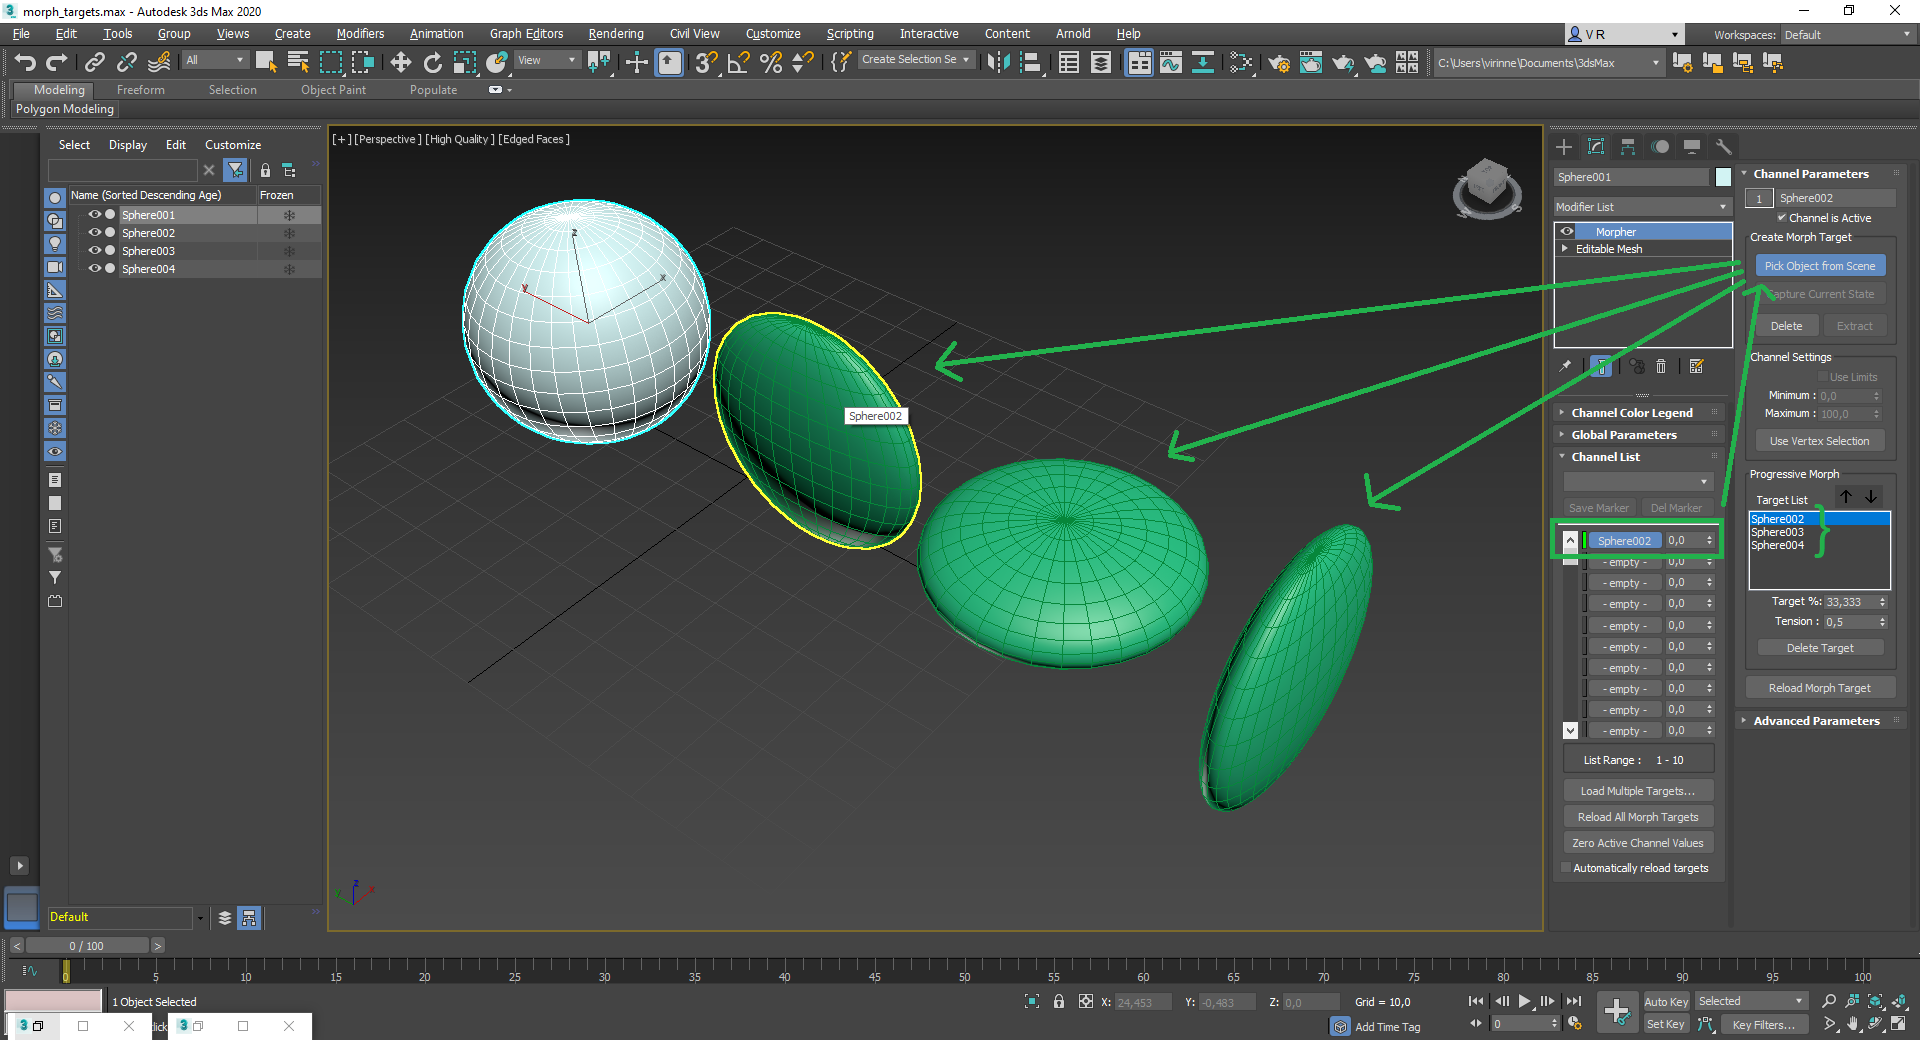
To add morph targets (one target per morph channel) to the Morpher modifier, select the modifier and click on the first morph channel in the Channel List. Now click on 'Pick Object from Scene' and then on one of the deformed spheres in the scene. Repeat these steps but with different morph channels until you have three morph channels pointing at three different deformed spheres.
That is how you setup single channel morph targets, you can now use the Weight for each morph channel to deform the asset!
If all colors are green you can send the asset of to Simplygon, make sure to use a Reduction Pipeline, otherwise the morph targets will get ignored!
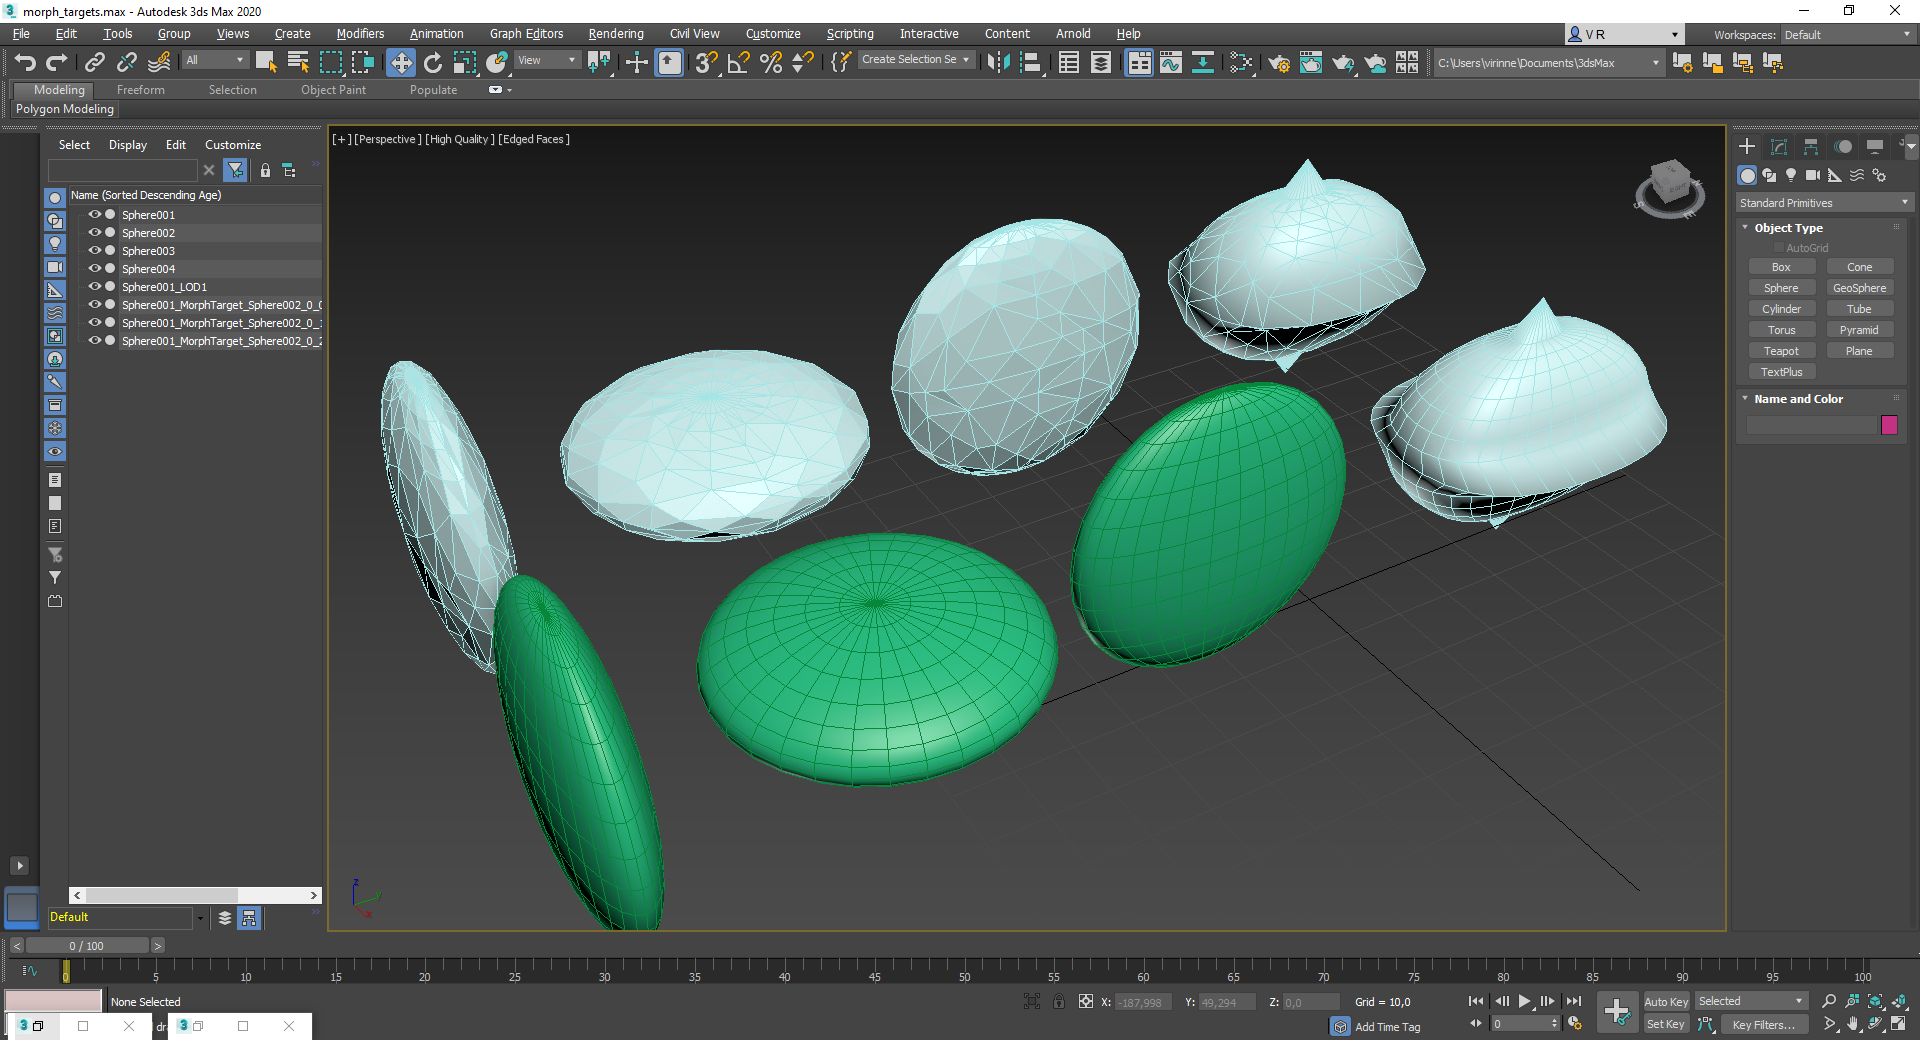
You should now see several new meshes in the scene; 'Sphere001_LOD1' which is the optimized asset, and the morph target meshes with MorphTarget in their labels.
Result (original at the top, optimized at the bottom):
# Multiple morph targets per morph channel (Progressive)
Let's add a Morpher modifier to the mesh you wish to morph / deform, we'll use 'Sphere001' throughout this example.
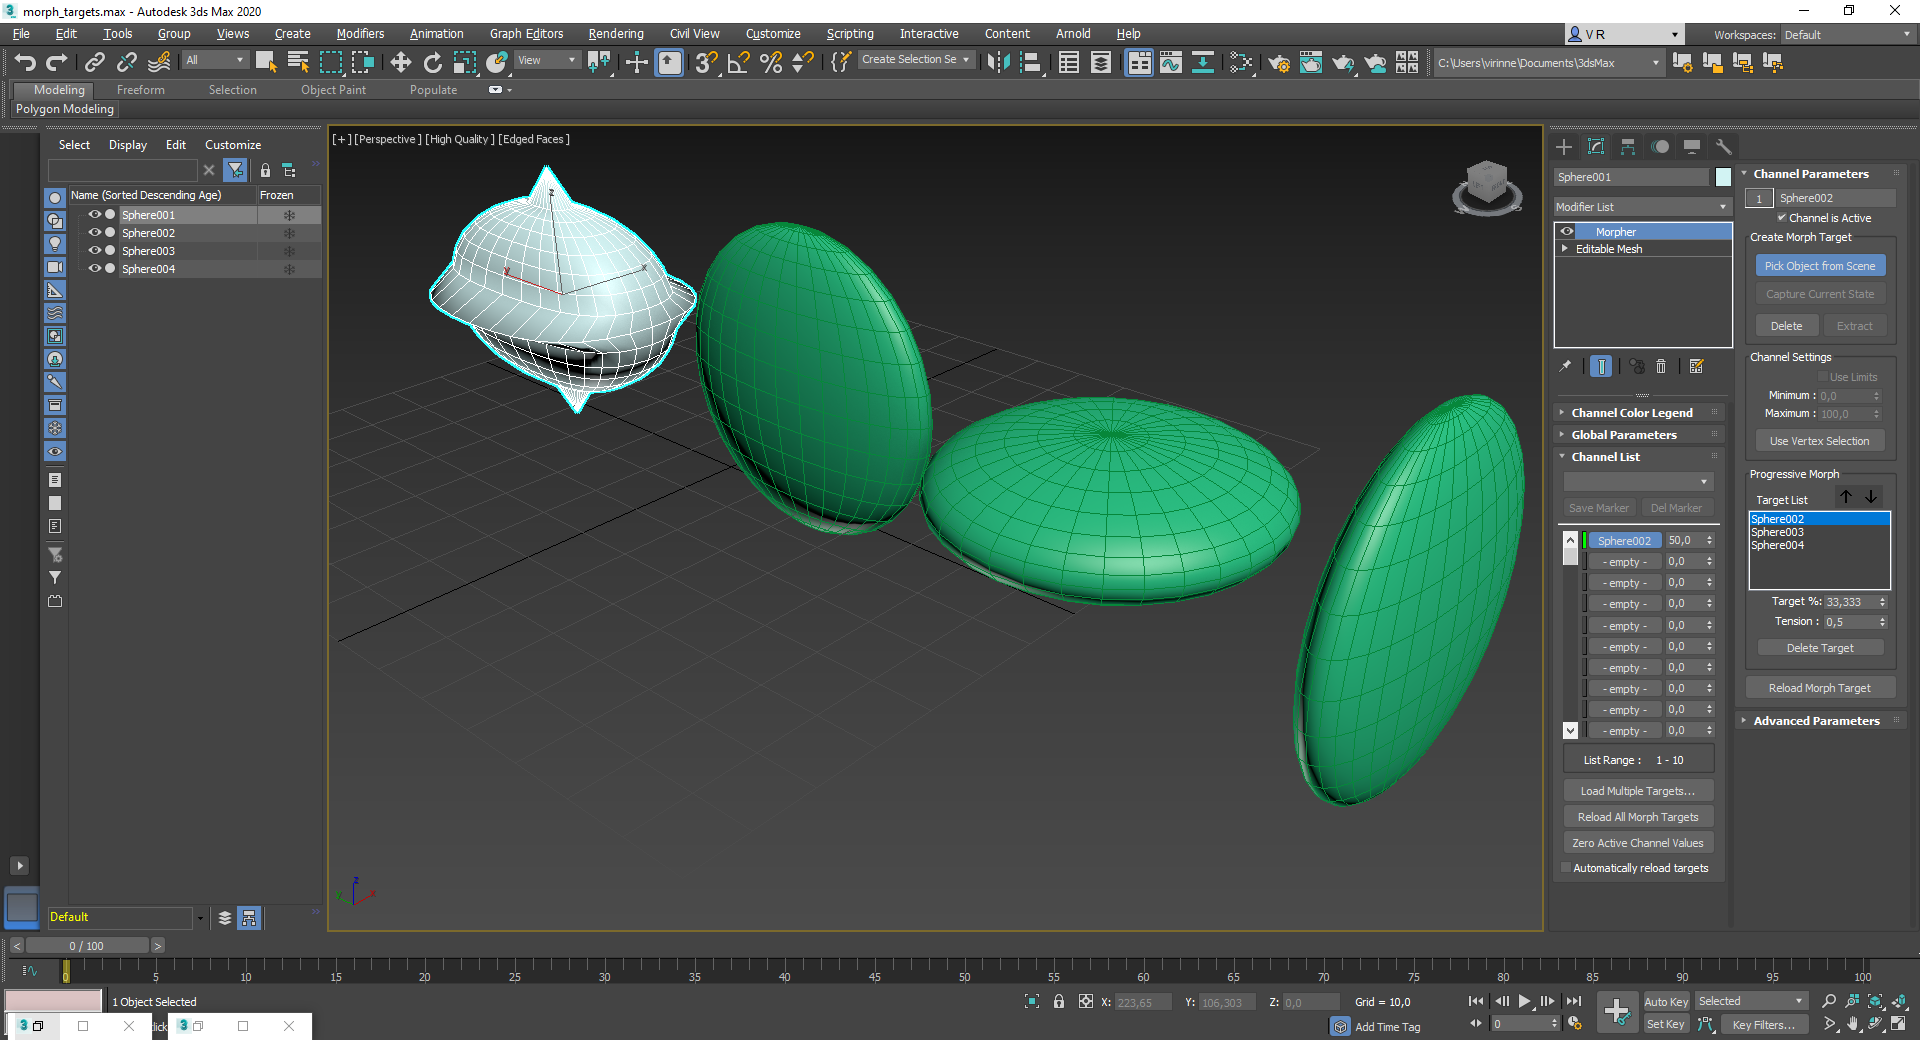
To add progressive morph targets (multiple morph targets per morph channel) to the Morpher modifier, select the modifier and click on the first morph channel in the Channel List. Now click on 'Pick Object from Scene' and then on one of the deformed spheres in the scene. Repeat these steps (while on the same morph channel) until you have three progressive morph targets in the progressive morph target list.
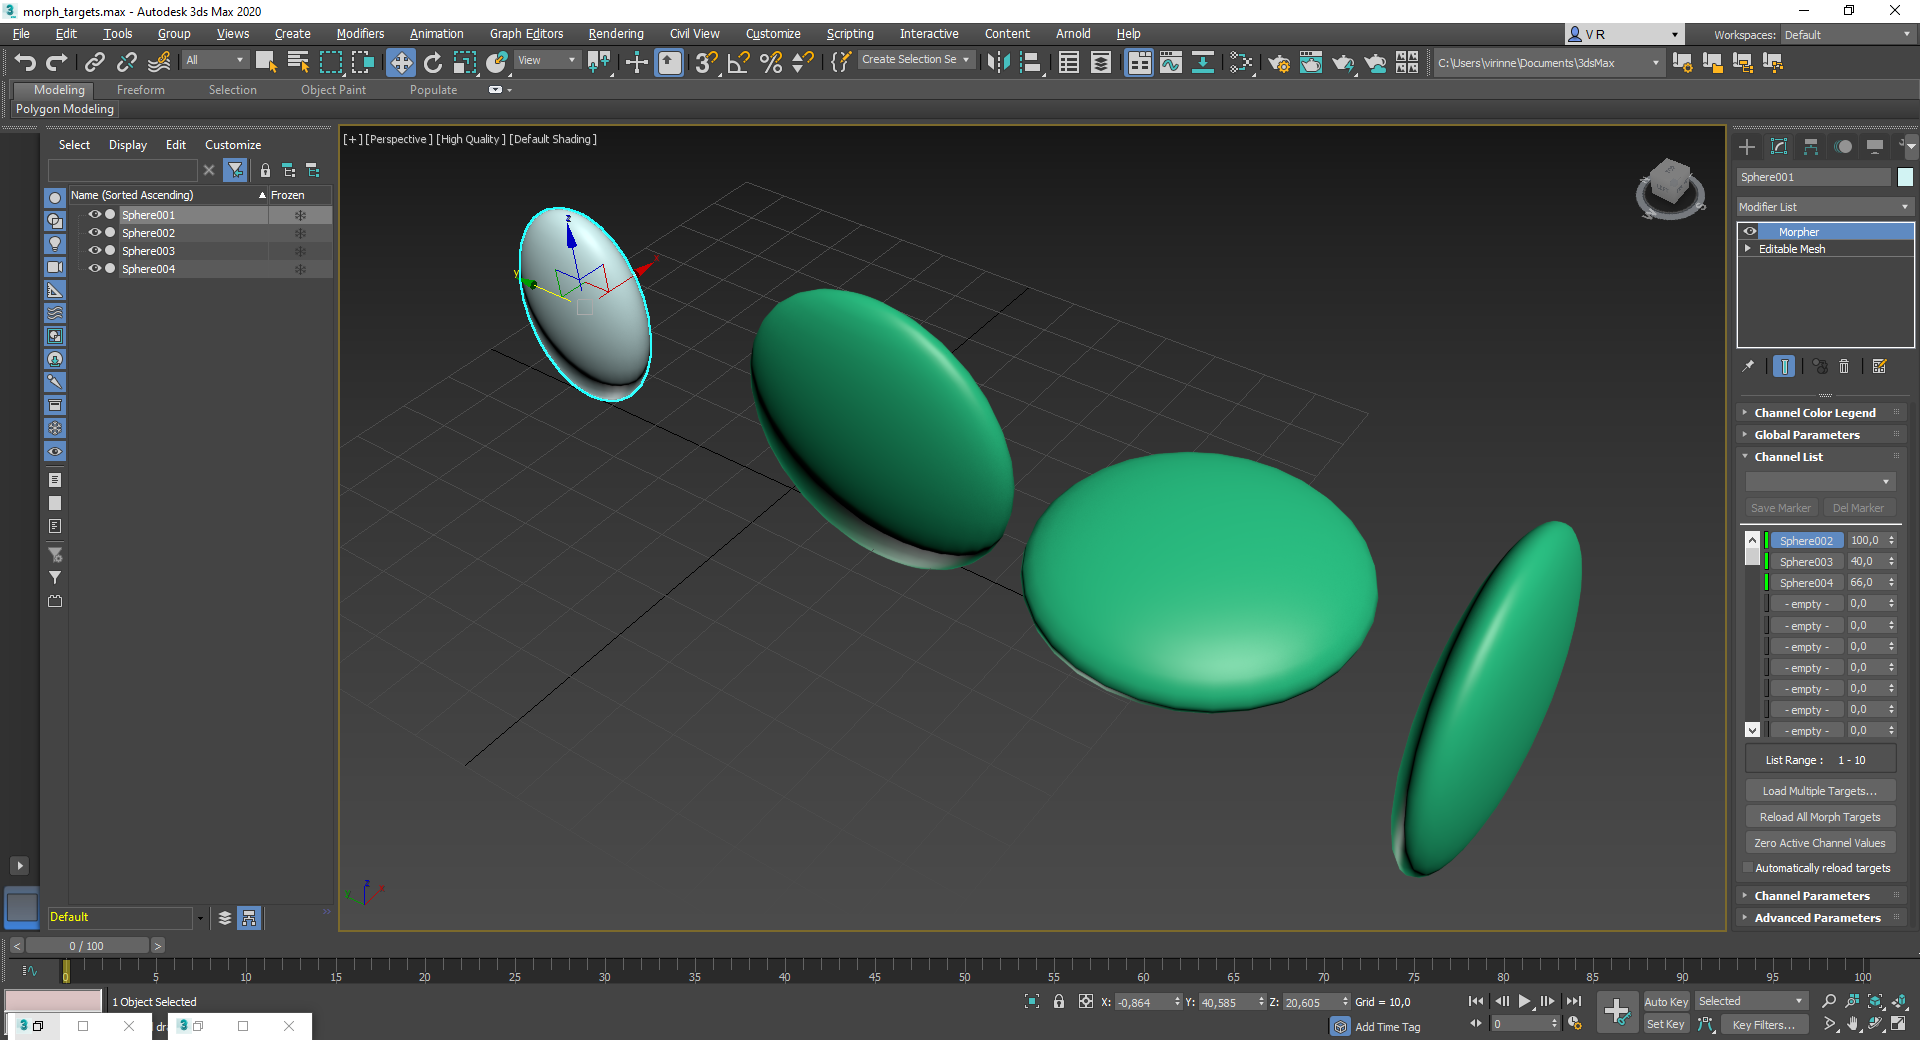
That is how you setup progressive morph targets, you can now use the Weight, Target % and Tension to adjust the progressive morph. Let's try the progressive morph by changing the morph channel weight to 50.
If all colors are green you can send the asset of to Simplygon, make sure to use a Reduction Pipeline, otherwise the morph targets will get ignored!
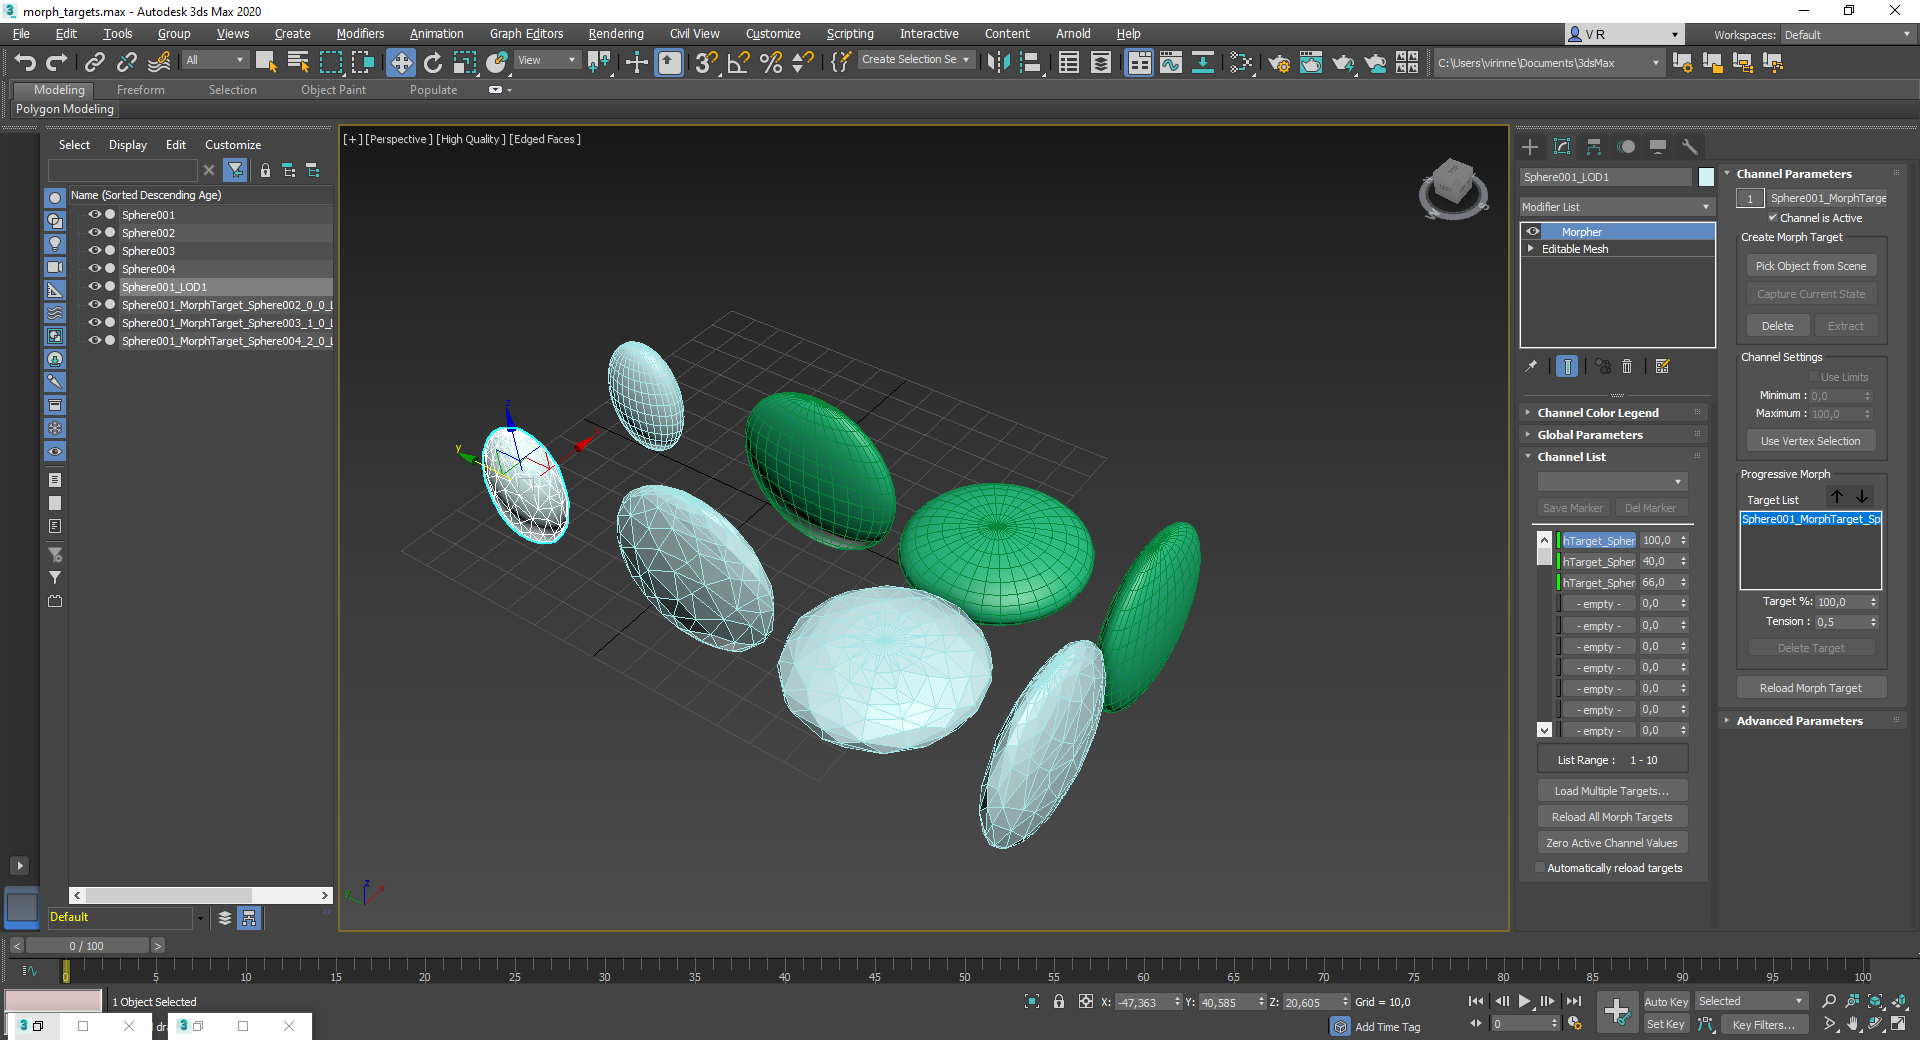
You should now see several new meshes in the scene; 'Sphere001_LOD1' which is the optimized asset, and the morph target meshes with MorphTarget in their labels.
Result (optimized at the top, original at the bottom):
# Troubleshoot
# Morph targets not getting transferred
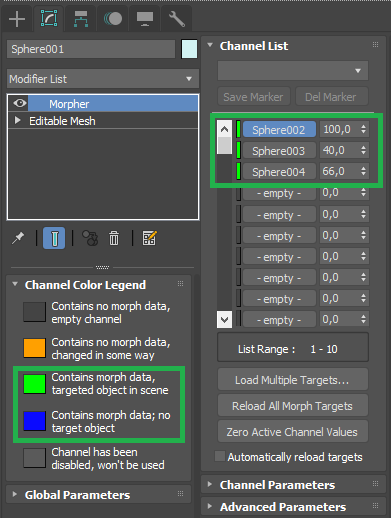
Please verify that the morph channels are enabled and valid by looking at the Channel Color Legend and the Color of the Morph channel in the Morpher modifier, before sending the asset off to Simplygon. Invalid and / or disabled morph channels will be ignored.
# Some 'Captured' progressive morph targets are missing
This is a known issue, we've not yet seen any way to access this data through the script interface for the Morpher modifier. Only the first captured progressive mesh will get transferred onto the optimized geometry. Progressive morph targets with links (reference to existing object in scene) will get transferred properly.
# Triangle distribution
Simplygon will reduce the morph targets (vertex fields) the same way as the original vertex field, this may in some cases distribute the triangles in a way that is sub-optimal for some types of (morphed) geometries.
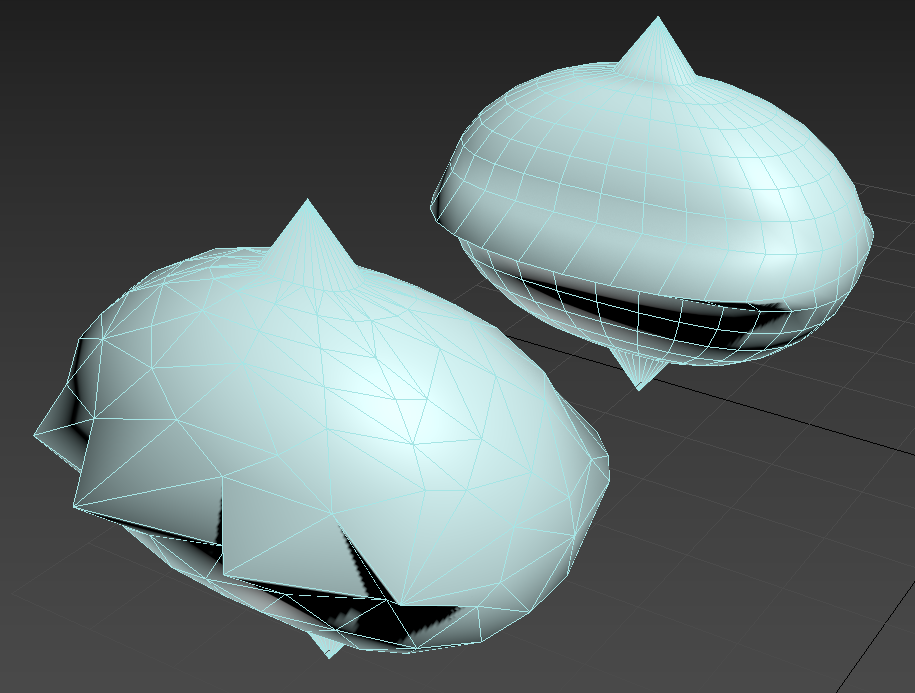
The scene in this example is for demonstration purposes, but there may be cases when an asset has several 'pointy' morph targets, which when greatly reduced will generate sub-optimal geometries (in terms of morph quality).
In the picture below we can see that these 'pointy' morph targets does not add up very nicely. In this case we recommend playing around with the Reduction Importance parameters to try to preserve for example silhouette.
# Avoid surfaces being welded
The Repair settings category allows the user to tweak welding parameters. Let's say that you have morph targets that morphs the lips on a character. In some cases Simplygon may see that (to reach the specified triangle count) it is appropriate to weld vertices that are sharing the same position, in this case vertex positions shared between upper and lower lip. To prevent Simplygon from stitching the mouth together you may try to reduce the welding distance, and also enable 'Weld Only Within Border Vertices' which then only allows welding of vertices at open borders.