# Preserve animation on skinned assets
The Simplygon Unity plug-in supports preservation of animation for Reduction, Aggregation and Remeshing for the Humanoid animation type, the Generic animation type will not preserve the bone structure. Once the optimization has completed the original avatar needs to be applied to the LOD for it to animate along with the original.
This section will go through each recommended step on how to preserve the animation for generated LODs. Please see known issues and limitations before proceeding.
# Import of animated asset
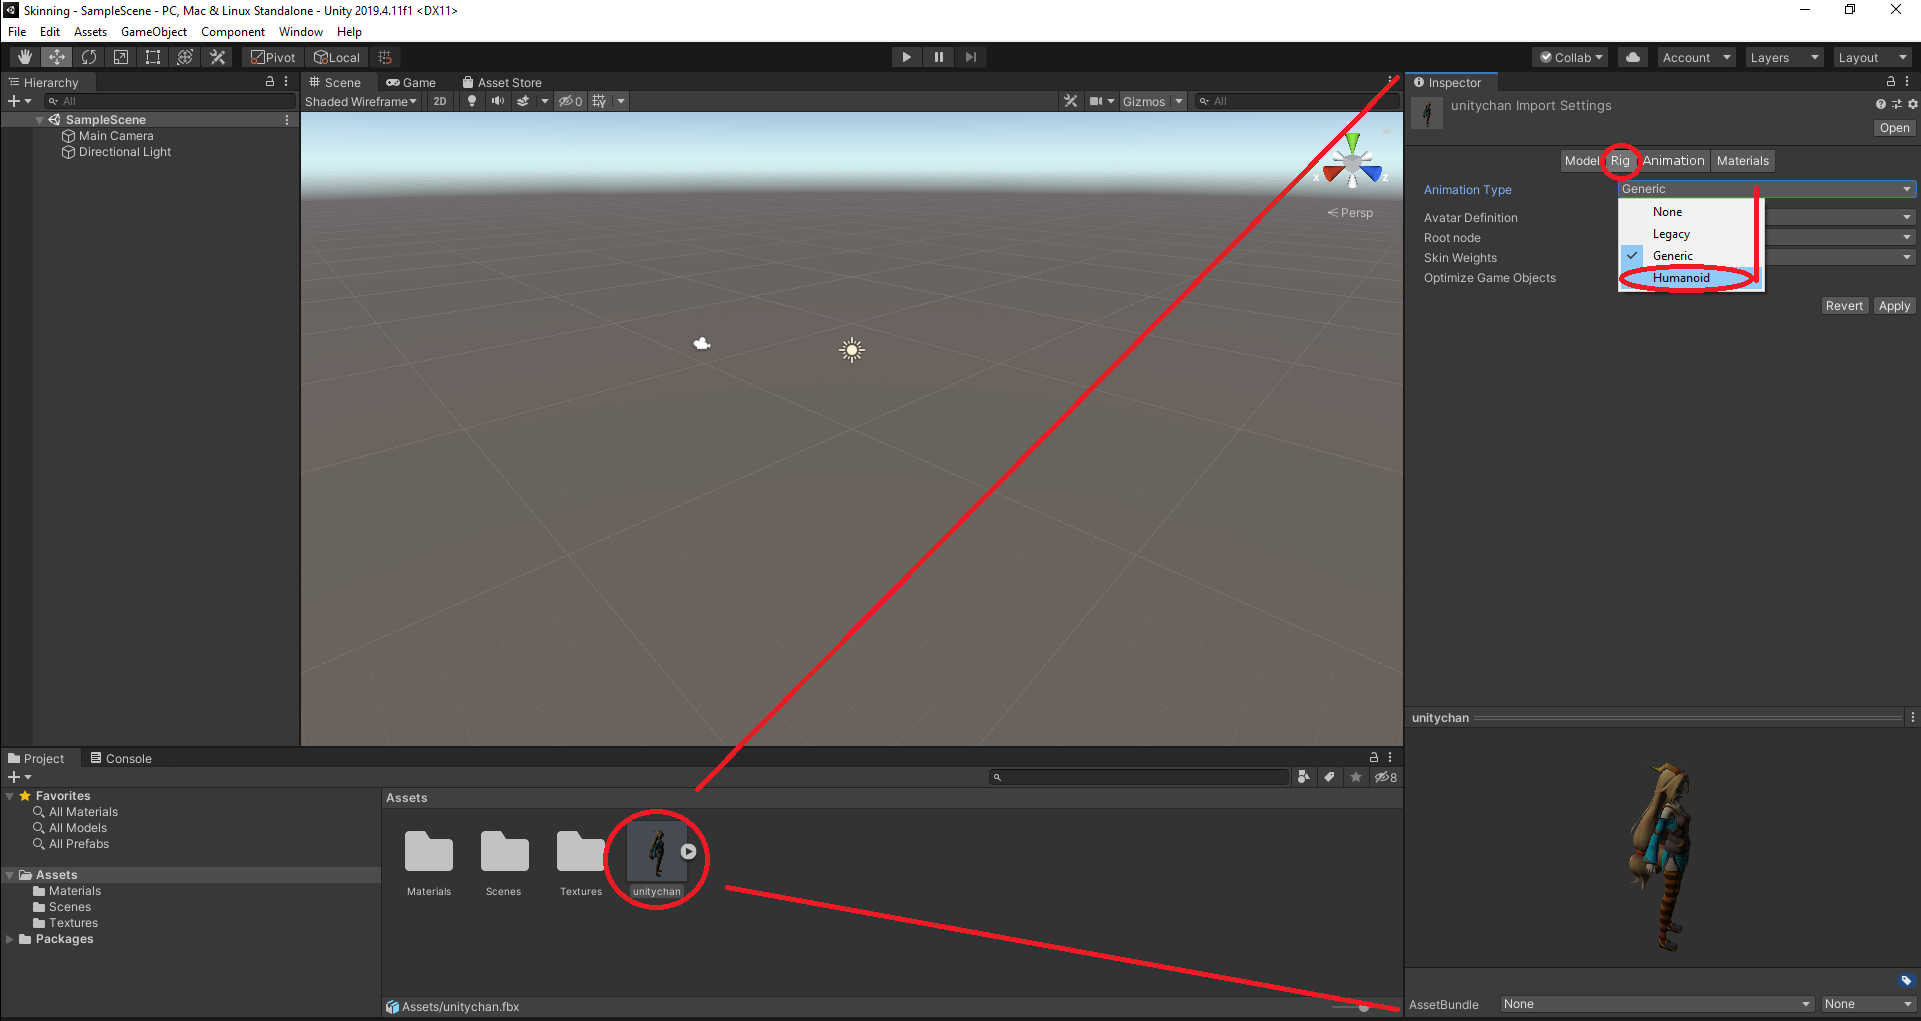
For the preservation of animation to work it is required to set the import animation type for the specific asset to Humanoid. This can be accomplished by selecting the asset in the asset manager, then in the inspector go to the "Rig"-tab and set the animation type to Humanoid and press apply.
# Verify animation (optional)
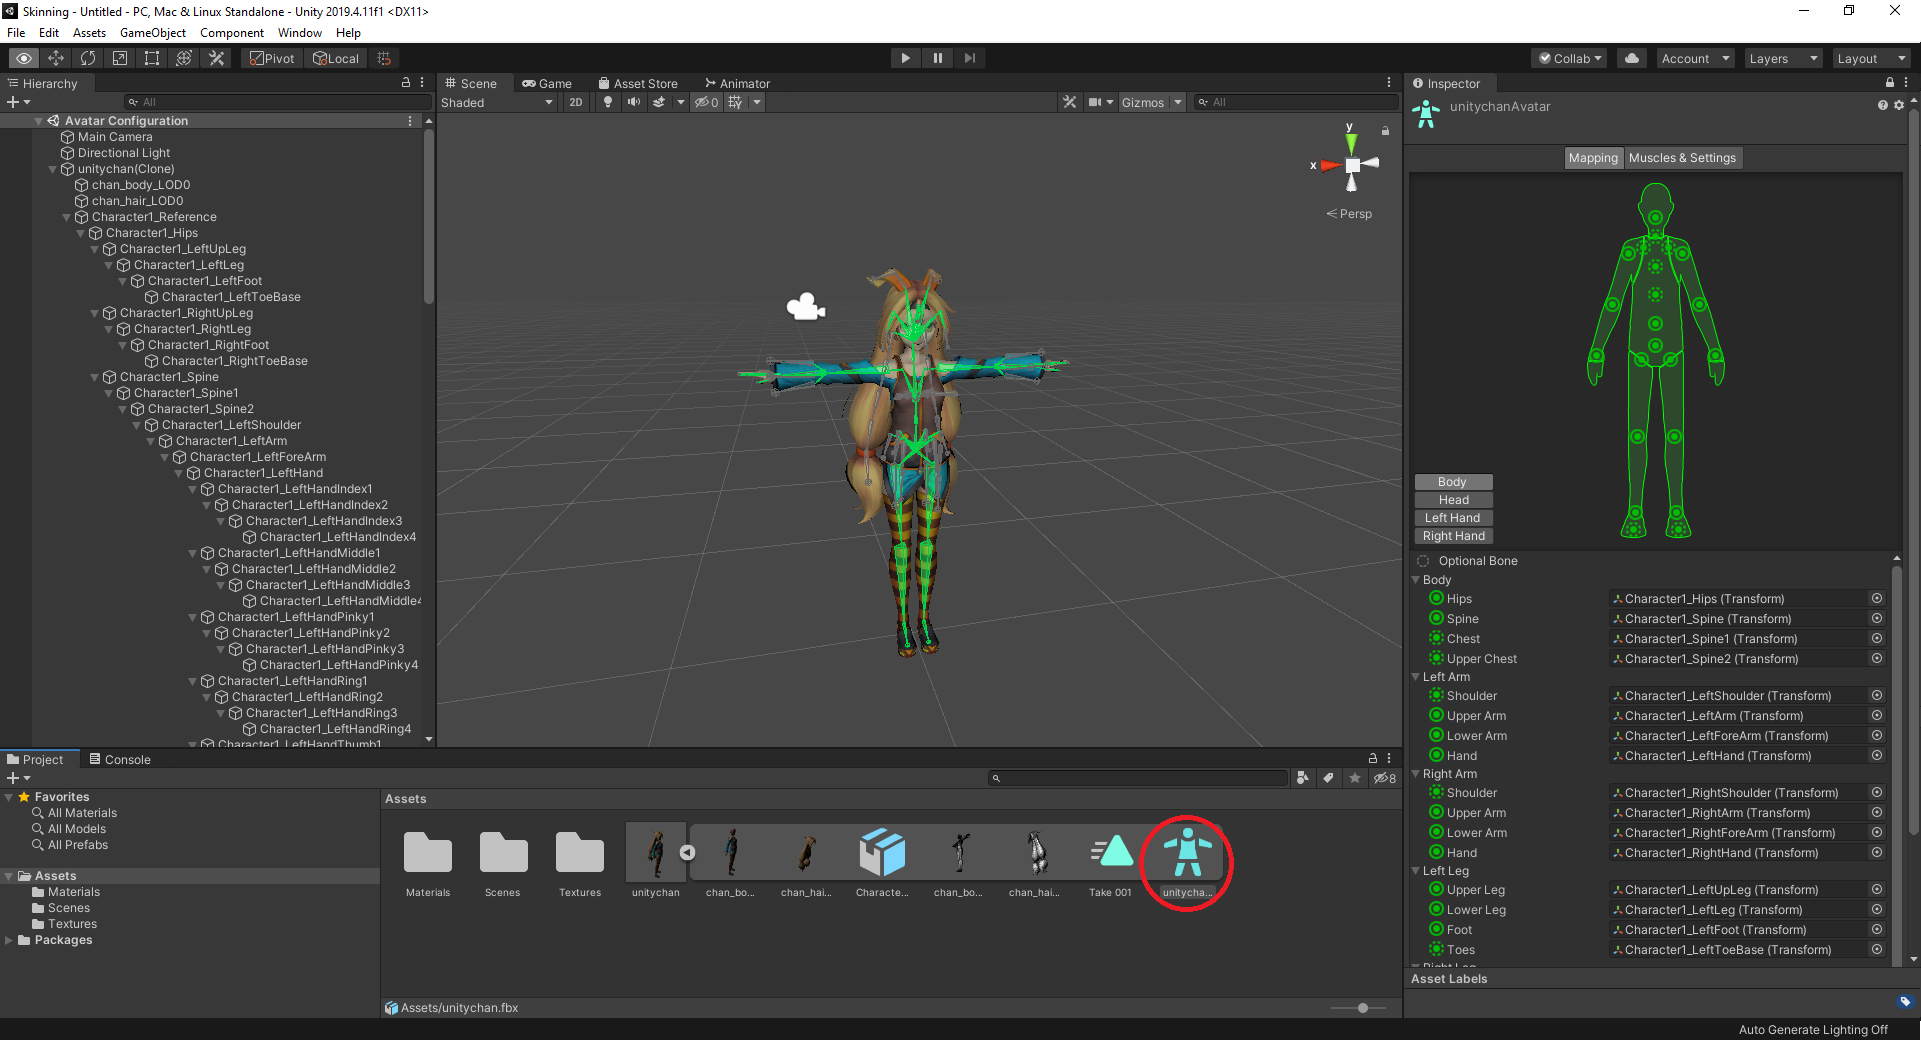
Before importing the asset you might want to confirm that the bone structure is correct, double click on the avatar for the specific asset in the asset manager. You should now be able to see how the bones map to the character as well as the humanoid skeleton.
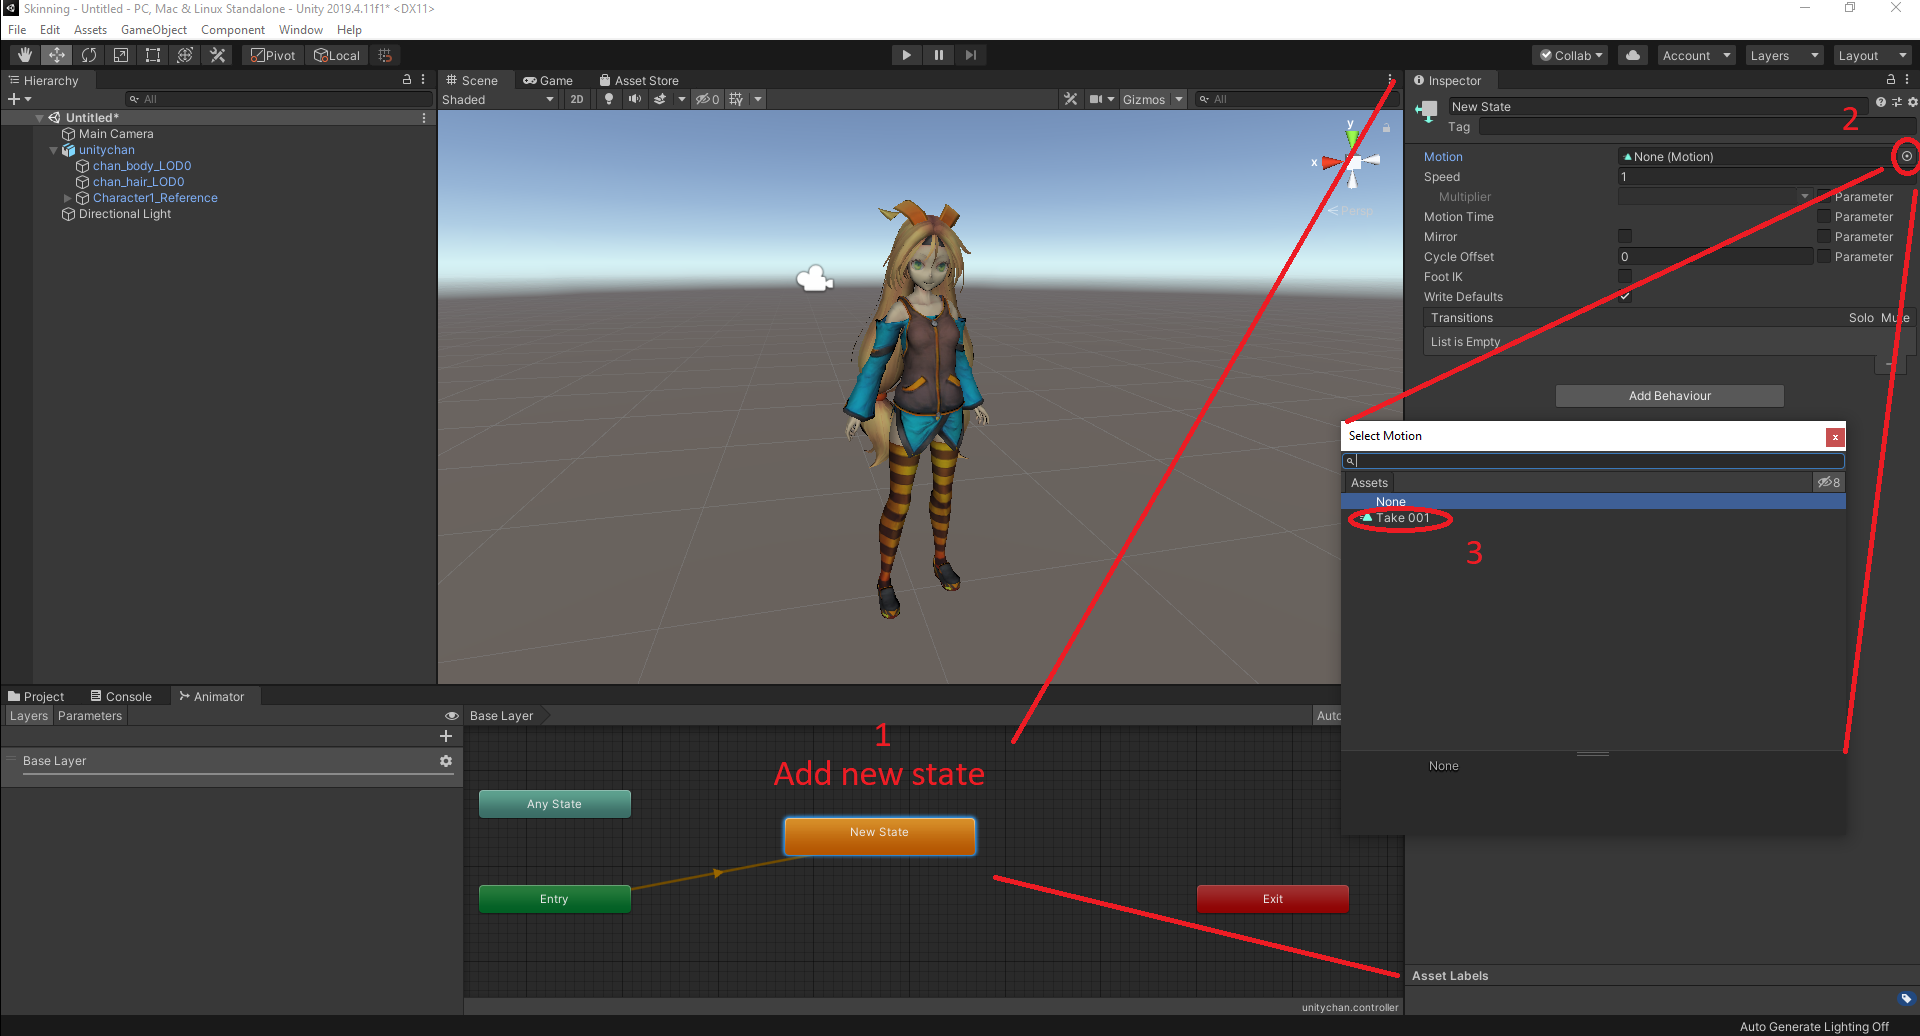
To verify that the animation works we may need to add a controller for the animator, if there already is a controller you may skip these setup steps. Right click in asset manager -> Create -> Animation Controller, this will add a new controller next to the asset, let's rename it to something more describing, we'll use "unitychan" for this example.

Let's double click the new controller in the asset manager, this will bring up the animator window with entry and exit states. Right-click and create a new empty state, then set the Motion for the state to an existing motion for the specific asset, in this case Take 001.
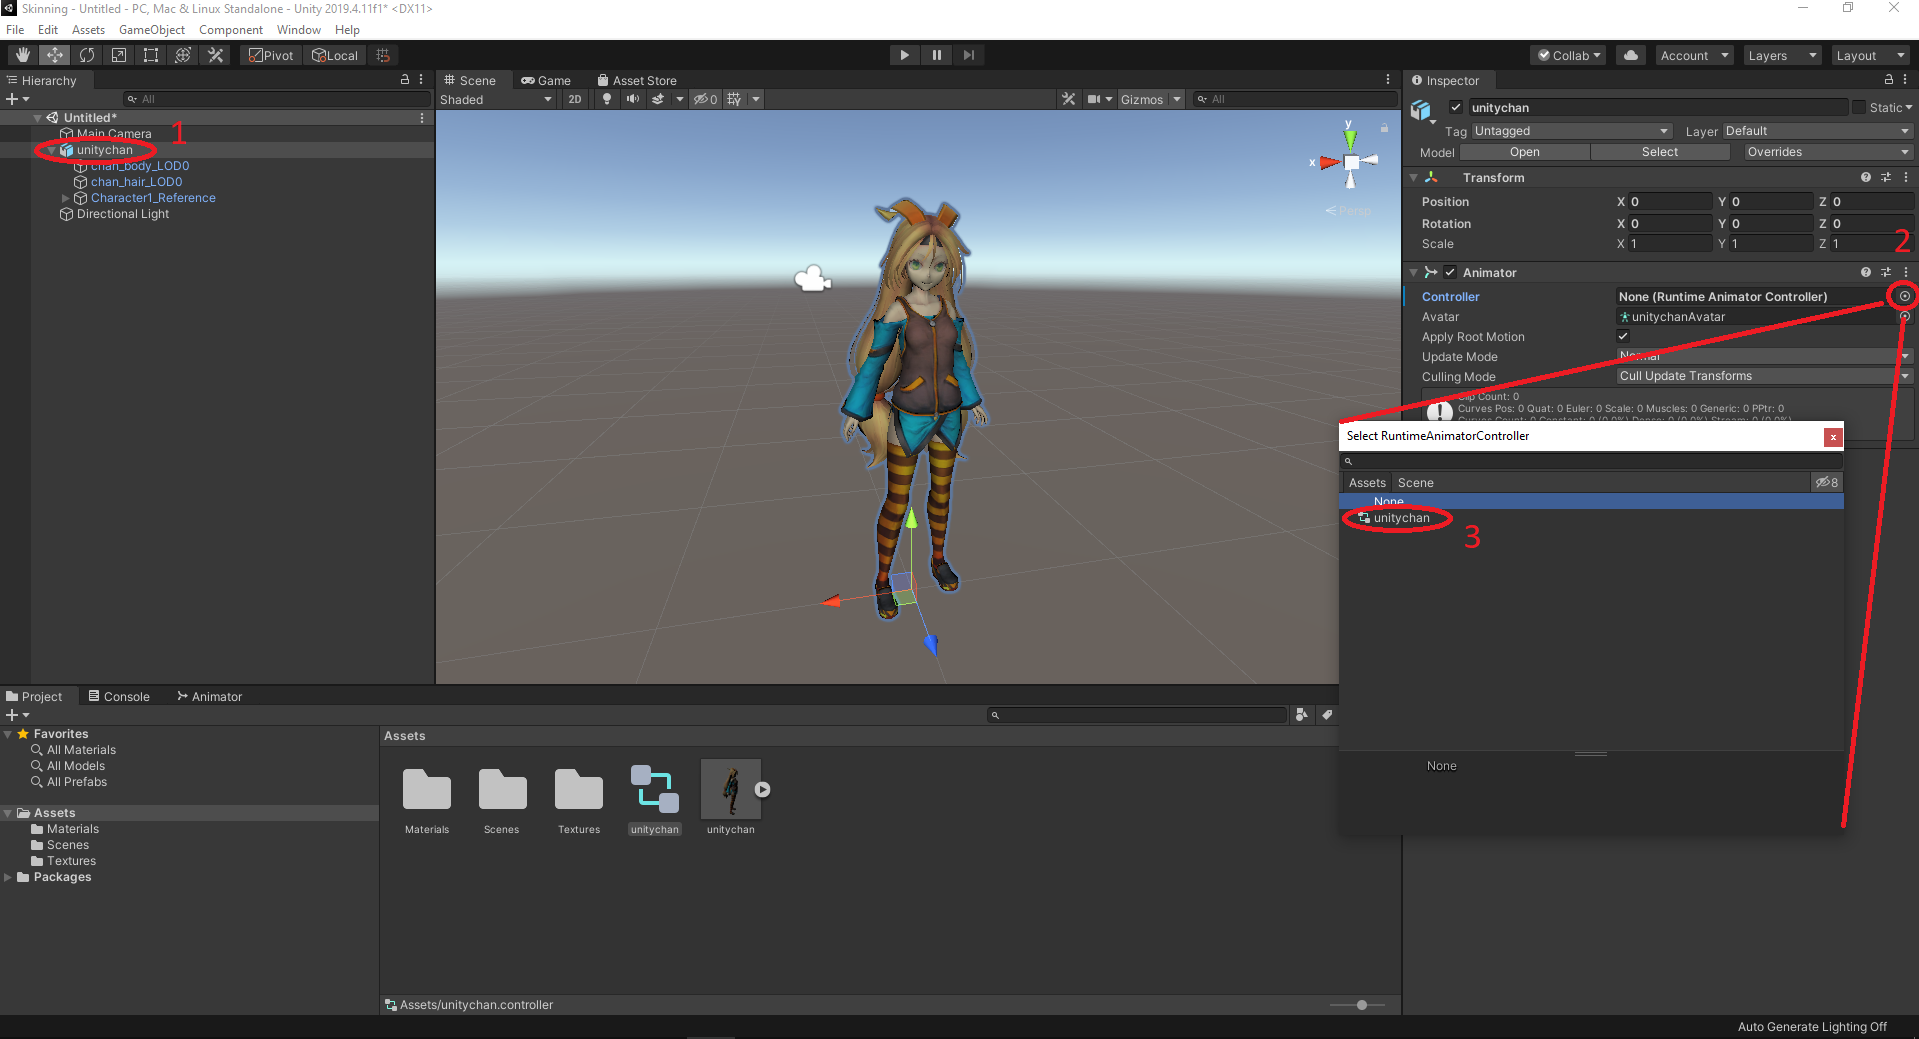
Make sure the asset is imported into the scene, then select the parent node of the meshes and skeleton as in the image below, then select the "unitychan" as animation controller.
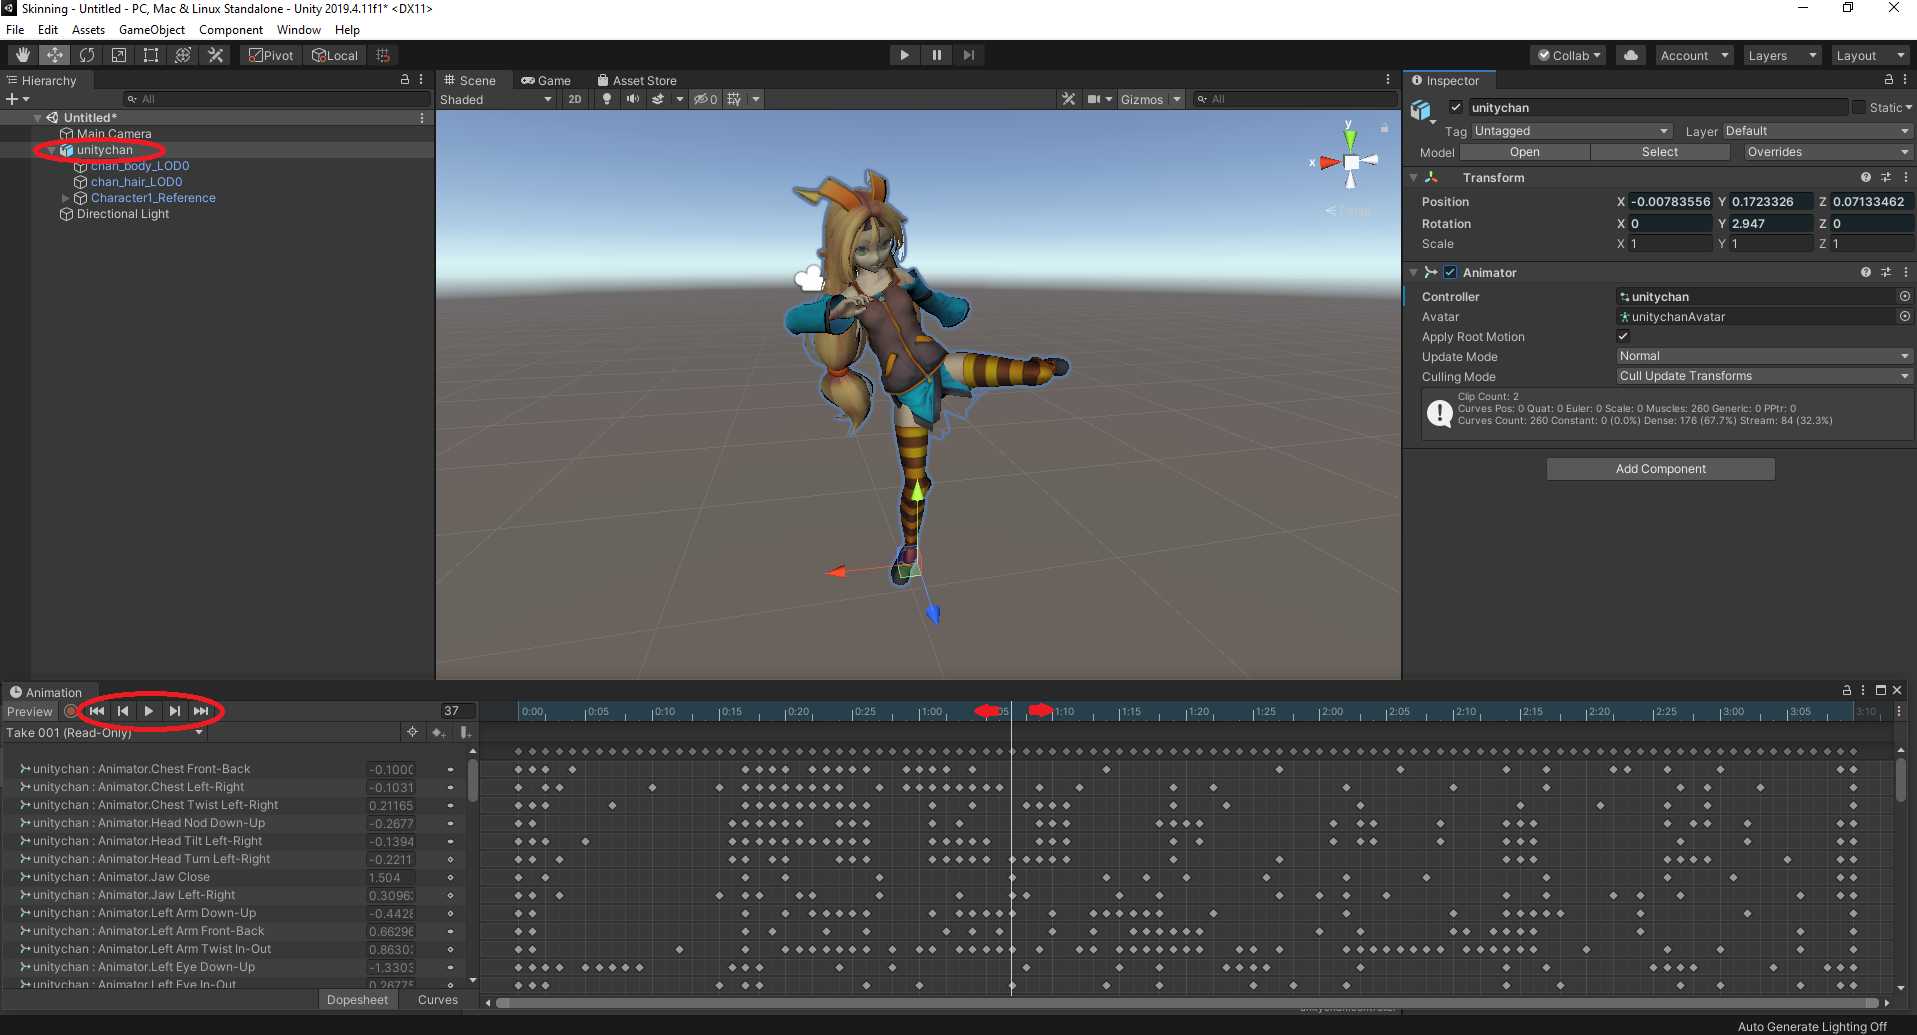
The last step is to play the animation, go to Windows -> Animation -> Animator to bring up the animator window, select the parent node that we previously assigned the animation controller to, then use the buttons / sliders in the animator window to see if the asset animates properly.
# Send selection to Simplygon
When selecting the asset that is to be passed to Simplygon, we recommend selecting the parent node (if available) that contains the meshes and skeleton. The optimized mesh(es) and skeleton will be placed under a parent node.
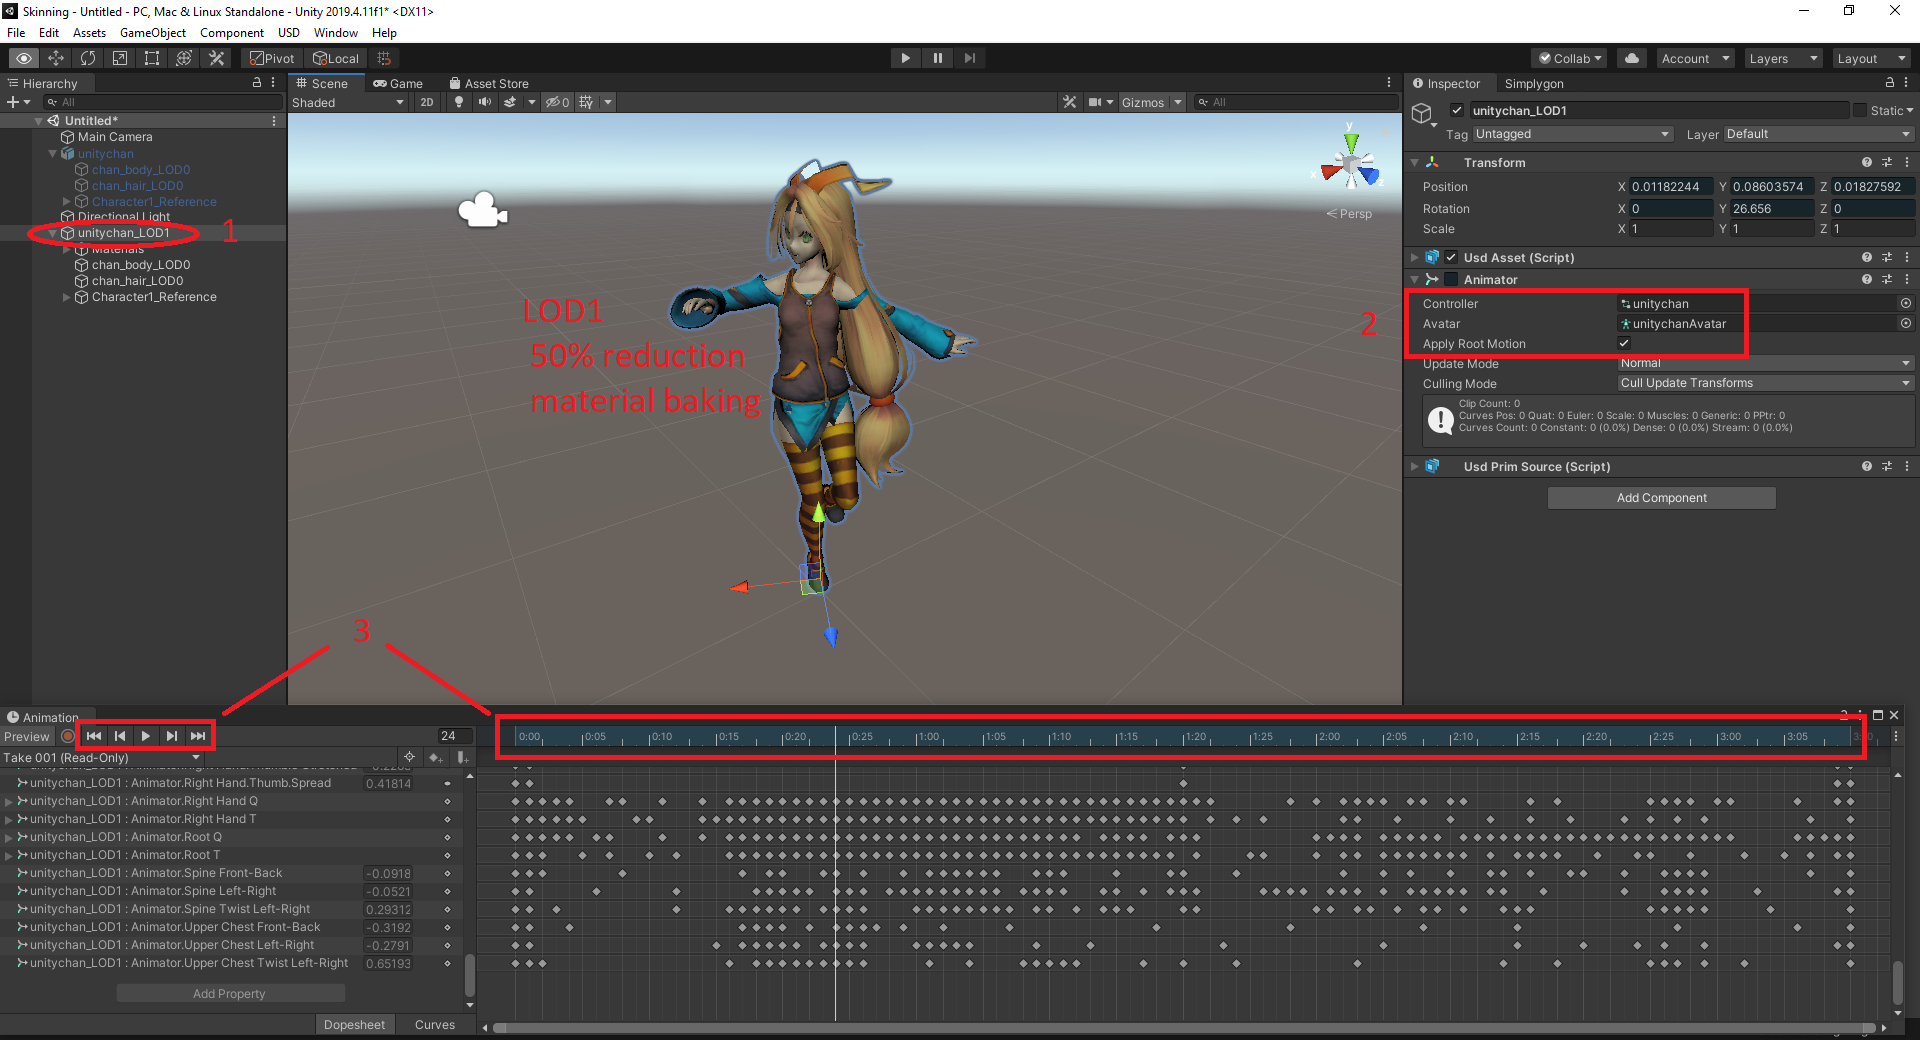
# Apply animation controller and avatar to optimized asset
When the optimization of the asset has completed it will be written back into the current scene. To validate the animation of the optimized asset we need to assign the original original animation controller and avatar to the optimized asset's parent node, as well as enable the Apply Root Motion checkbox. The optimized asset should now react to the animation state set in the animation window.