Simplygon Grid Admin Utility
The Admin Utility application connects to a specific Simplygon Grid Server and expose job and processing history as well as adminstrative handling of various domains such as users, Simplygon Libs and processing presets. Multiple instances of the Admin Utility may be launched in order to improve monitoring of multiple Simplygon Grid Servers.

Installation path and installer options
See Installation/Setup for installation path and installer options.
Startup
Start the Admin Utility via the Admin Utility - Simplygon Grid shortcut or the Simplygon.Cloud.Yoda.LocalAdmin.exe executable located at <install folder>\AdminUtility which by default evaluates to %programfiles%\Simplygon\Grid\AdminUtility.
Server login
To adminstrate or monitor a specific Simplygon Grid Server the Admin Utility first needs to login to the desired Server. Once the Admin Utility has started enter the IP address, port number and login credentials of one of the Server's administrator accounts.
Note
By default upon installing the Simplygon Grid Server service, an administration account is created which use the user name and password user.
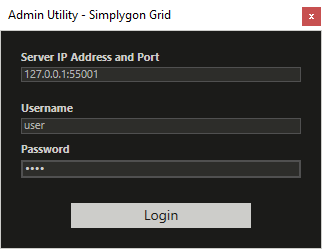
The Simplygon Grid Admin Utility login window, presented on application startup.
Admin Utility UI and settings
The Admin Utility UI hierarchy and content is presented below:
 The Admin Utility main window.
Main window - Menu Options
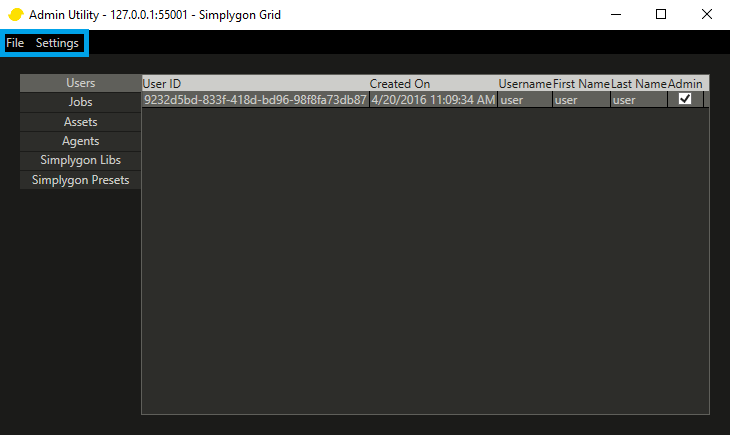
File
Update
Refreshes the data displayed in the Admin Utility (all tabs).Logout
Logs out the currently logged in user and presents the login window.Exit
Closes the Admin Utility application.
Settings
Server Preferences...
Shows the Server Preferences window where the Server's port, application directories and asset cache clean-up may be edited.
Port
The port number the Server shall use. Changing the port will require Grid clients and Grid Agents to re-login using the new port number.Enable logging
If checked the Server will log execution to <log directory>\server<date of enabling logging>.log.Directories
Paths on the machine running the Server where temporary, work and log data will be written. Since these paths can not be changed remotely via Admin Utility, the Simplygon.Cloud.Yoda.Frontend.LocalService.exe.Config config file has to be edited manually on the machine running the Server service. The config file is located at <install folder>\Server which by default evaluates to %programfiles%\Simplygon\Grid\Server.Note
The Simplygon Grid Server service (Simplygon Grid Server) must be stopped prior to any direct editing of the settings in the Simplygon.Cloud.Yoda.Frontend.LocalService.exe.Config config file.
Asset Cache
The work directory contains uploaded and cached asset data which over time may consume a considerable amount of disk space. In order to limit the amount of used asset cache disk space it is recommended to have the cache clean-up feature enabled and set to a suitable time span, depending on the usage scenario.The benefit of the asset cache is that asset processing may start immediately since a client does not need to upload an asset that has previously been uploaded. The cache also stores processing results in a per-asset and per-processing manner - the client may immediately download the processing result if the asset in question already has been uploaded and processed using the indicated processing settings.
Caution
A short (frequent) asset clean-up interval may remove processing results prior to the issuing client being able to retrieve it. For example, a clean-up interval of 5 minutes would require that the client downloads the processing results within 5 minutes from starting processing an asset.
Main window - Tabs
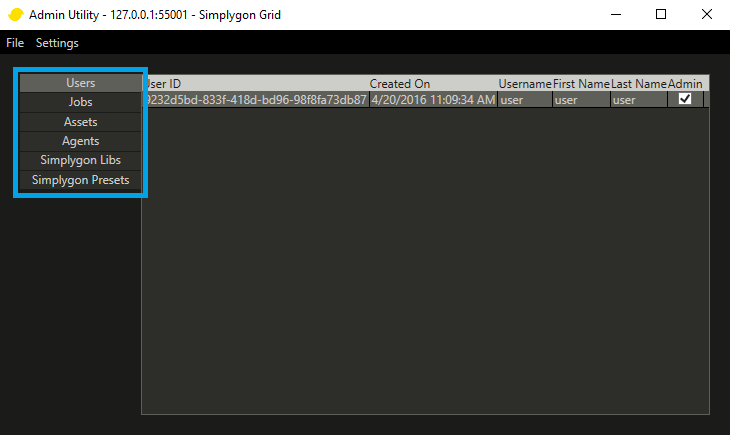
Each tab presents a table of a specific domain where right clicking on the table brings up domain specific interaction options. To select all rows of the table being presented, press Ctrl+A.
Users
Lists all Server users that may connect to the Server. Right click the table to:
- Refresh table contents
- Add user
- Delete user
Jobs
Lists all Server processing jobs. Right click the table to:
- Refresh table contents
- Delete selected job(s)
Delete all jobs
Note
Deleting an ongoing job will make the designated Agent abort the job.
Assets
Lists all Assets located on the Server. Right click the table to:
- Refresh table contents
- Delete the selected asset(s)
- Delete all assets
Agents
Lists all Agents that are connected to the Server. Right click the table to:
- Refresh table contents
- Enable or disable selected Agent(s)
- Enable or disable all Agents
Simplygon Libs
Lists all Simplygon Libs available to the Server. The Simplygon Lib currently set as preferred will be downloaded and employed by any connected Agent. Right click the table to:
- Refresh table contents
- Set selected Simplygon Lib as Preferred
- Delete selected Simplygon Lib
- Upload a Simplygon Lib
Simplygon Presets
Lists all Simplygon Presets (Simplygon UI settings files) located on the Server. Right click the table to:
- Refresh table contents
- Show contents of selected preset
- Delete selected preset
- Add a preset file
Note
Right click the table to bring up interaction options.
Note
Press Ctrl+A to select all table rows.
User administration
The Users tab presents the Grid Server user accounts that are currently setup on the Server. A user account having the Admin attribute has an administrative role and will be able to login to the Server by using the Admin Utility.
By default, after Grid Server installation has completed, there exists a user account which has an administrator role and uses user name and password user.
Add a user account
| Step | Action |
|---|---|
| 1 | Select the Users tab and right click on the table to select the Add user option. |
| 2 | Enter the user details in the presented Add User window.  The user name and password entered will be used when logging in to the Simplygon Grid from an arbitrary client such as the Simplygon UI. Select the Admin check box if the user shall be given an administrator role, thus making the account able to login to the Server using the Admin Utility. |
| 3 | Click the Add User button. |
| 4 | Check that a row that corresponds to the entered user details was created in the presented Users table. |
Delete a user account
| Step | Action |
|---|---|
| 1 | Select the Users tab and right click the user entry to delete and select the Delete user option. |
| 2 | Confirm that the user shall be deleted. |
| 3 | Check that the user is no longer presented in the Users table. |
Change admin credentials
To change the default administrator account credentials do the following steps:
Note
Default admin credentials:
Username: user
Password: user
| Step | Action |
|---|---|
| 1 | Add a new user with admin authority (by checking the admin option). |
| 2 | Delete old admin user account. |
Jobs and assets
The Jobs and Assets tabs present job related data such as date created, current status, error messages and file size. An entry in the Jobs tab corresponds to a processing job issued by a client. An entry in the Assets tab corresponds to either a cached asset or a cached asset processing result where a specific processing setting was used, depending on whether the entry has an allocated Parent Asset ID.
An ongoing job may be deleted (aborted) in the Admin Utility by right clicking on the job entry and selecting the Delete job option. The Delete job action produces the same result as aborting an ongoing job via the Agent UI but will result in a different error message on the client - using the Admin Utility to perform the delete action may be more feasible than having to use the Agent UI on the machine that is processing the job.
A cached asset or cached asset processing result may be deleted by right clicking on the desired table row and selecting the Delete asset option:
Deleting an asset that lacks a Parent Asset ID removes the Server side cached asset representation which would be used for subsequent processing and will force a re-upload of the asset should it be processed again.
Deleting an asset that has a Parent Asset ID removes the Server side cached processing result where a specific processing setting was used - the asset will get re-processed once the particular processing setting is used, but upload of the original asset will not take place.
Note
Many per asset parameters are considered when creating the asset cache hash, and under certain circumstances the client side's locally held asset may mismatch the processing result on import, or the processing result may appear in an unexpected manner due to the Server side hashing algorithm failing to detect any asset attribute changes, leading to a cached asset being processed instead of the actual (intended) asset.
For these cases it is recommended to delete the concerned asset entries in order to force a re-upload and/or re-processing of the asset next time it is issued for processing by a Simplygon Grid client such as the Simplygon UI.
 The Asset tab shows that the 'simplygon_man' asset was uploaded 1:14:37 PM and has been processed at 1:15:29 and 1:16:49 PM using two different settings.
Simplygon Lib handling
Each time a Grid Agent processes a job a specific Simplygon Lib version is used to do the actual processing of the asset. The Lib used depends on which Lib is selected as Preferred in the Simplygon Libs tab. When an Agent detects that its current Lib mismatches with the one set as preferred in the Admin Utility, the preferred Lib gets automatically downloaded and used by the Agent in subsequent processing jobs.
Since a specific Simplygon Lib relates to a specific Simplygon SDK build, the normal use-case is to just use the default preferred Simplygon Lib that is part of the Simplygon SDK 8.3 installer package.
Simplygon Libs uploaded to the Simplygon Grid Server are stored in %programdata%\Simplygon\Grid\Server\SimplygonLibs on the machine that runs the Server, while the Agent stores downloaded and extracted Lib archives in %localappdata%\Simplygon\Grid\Agent\SimplygonLibs on the machine that runs the Agent.
Set Lib as Preferred
| Step | Action |
|---|---|
| 1 | Select the Simplygon Libs tab and right click on the Simplygon Lib entry that shall be considered as preferred and select the Set as preferred option. |
| 2 | Check that the entry has the Preferred checkbox checked. Any connecting or already connected Agents will now download the preferred Lib once the periodic check is conducted (within 60 seconds). |
| 3 | The current Simplygon Lib used by an Agent can be inspected by clicking the Simplygon icon |
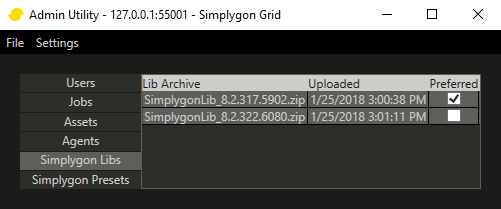
The Simplygon Libs tab shows two uploaded Simplygon Lib archives where 'SimplygonLib_8.2.317.5902' has been set as preferred and consequently will be used by any connecting or already connected Agent.
Upload Simplygon Lib
| Step | Action |
|---|---|
| 1 | Select the Simplygon Libs tab and right click on the table to select the Upload Simplygon Lib option. |
| 2 | From the presented open file dialog, select the desired Simplygon Lib .zip file. |
| 3 | Check that an entry containing the desired Lib was added in the Simplygon Libs table and, if desired, set the Lib as preferred. |
Delete Lib
| Step | Action |
|---|---|
| 1 | Select the Simplygon Libs tab and right click on the Simplygon Lib entry to delete and select the Delete SimplygonLib <version> option. |
| 2 | Check that the entry was removed from the Simplygon Libs table. |
Note
Deleting a preferred Lib will automatically set the most recently uploaded Lib as preferred.
Presets (Simplygon UI processing settings)
Presets can be saved from the Simplygon UI and then used as a processing setting (a settings template) for other Simplygon UI clients in order to avoid repetetive settings setups and to ensure a specific setting is available to multiple clients that connects to a specific Simplygon Grid Server.
The Simplygon Presets tab shows the presets that are currently available on the Server and that will be automatically imported to a Simplygon UI client once it logins to the Server.
Add preset
| Step | Action |
|---|---|
| 1 | Select the Simplygon Presets tab and right click on the table to select the Add preset option. |
| 2 | In the presented Add Preset window click the ... button to select a preset file via an open file dialog, or directly enter the path to the desired preset file. |
| 3 | Enter a suitable name of the preset. If the preset file was selected via the open file dialog the preset is automatically given the name of the file. At the time of writing the Type and Description attributes are not being used - the Type attribute will eventually be used to filter which presets a specific client shall import and/or display. |
| 4 | Click the Add Preset button and check that a preset entry was created in the Simplygon Presets tab. |

The Add Preset window.
 The Simplygon UI's 'Server Presets' folder lists all presets that are located on the Simplygon Grid Server.
Show preset contents
| Step | Action |
|---|---|
| 1 | Select the Simplygon Presets tab and right click on the entry of the preset for which contents shall be shown and then select the Show contents option. |
| 2 | The preset contents are shown in the default .txt file viewer. |
Delete Preset
| Step | Action |
|---|---|
| 1 | Select the Simplygon Presets tab and right click on the preset entry that shall be deleted and then select the Delete preset option. |
| 2 | Check that the entry was removed from the Simplygon Presets table. |