Hierarchical Level-of-Detail
If the above clip doesn't load correctly, click here.
Hierarchical LOD Window
Hierarchical level of detail (HLOD) was first introduced in 4.7 and has been greatly improved in 4.11, therefore we recommend using 4.11 or later if you are considering using the feature. Before you can use it you need to enable it in the World Settings. After enabling this feature you can navigate to: Window > Hierarchical LOD Outliner in order to bring up the HLOD window below.

- Process and preview bar
- Outliner
- HLOD levels settings
Terminology
- Hierarchical Level Of Detail levels - The hierarchy level deciding when to switch in the clusters
- Clusters - a group of actors which are representing the source meshes fed to Simplygon when creating the proxy mesh
Hierarchical LOD setup
Before digging into generating the levels we first need to familiarize with the settings. At first you begin with one level, you can add levels by pressing the plus sign on the row belonging to Hierarchical LODSetup. Each level has two types of settings: Cluster generation settings and Mesh generation settings.
Per level settings
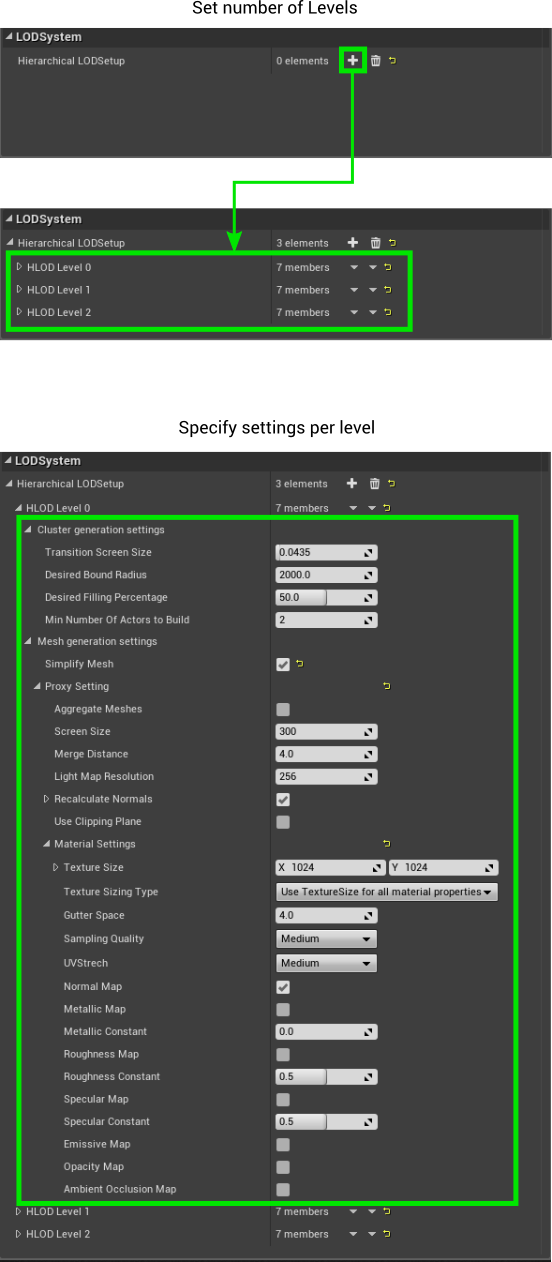
Cluster settings are utilized to setup the clustering algorithm when running the fully automatic HLOD generation. Mesh settings is where you setup the settings for the proxy mesh. If you have used the MassiveLOD tool you will recognize these settings. In order to use Simplygon make sure to check Simplify mesh, this will bring up the Proxy Settings and the remeshing processor is utilized to create the proxy meshes for each cluster. The size of each proxy mesh is decided by the Screen Size. Note that screen size is set per level so each cluster in a level will use the same screen size. The proxy settings also includes material baking settings where you choose texture sizes, gutter space etc.
Note
Enable Simplygon by checking "Simplify Mesh"
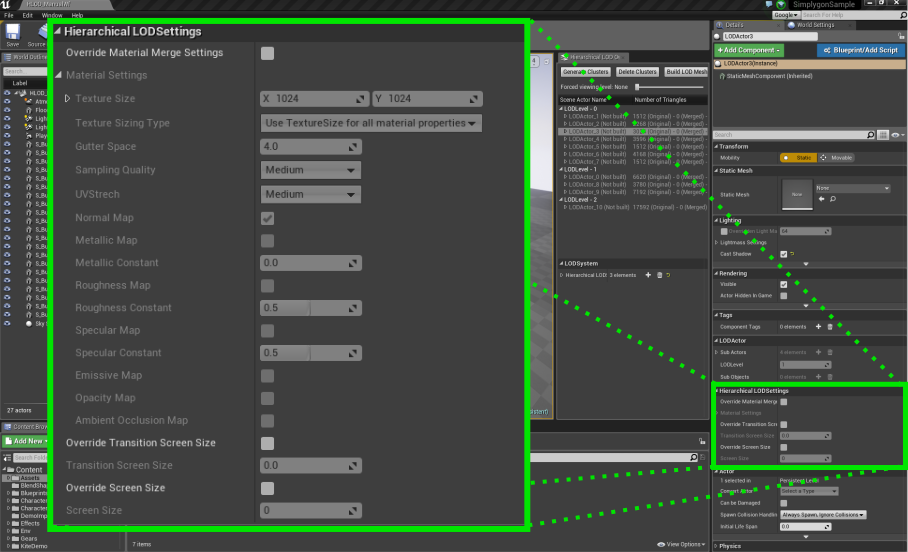
Per cluster settings
At some points it can be really useful to edit optimization settings per cluster, especially if you are noticing only one or two cluster a very noticeable when switching. So instead of re-processing the whole HLOD, select the cluster you would want to adjust and navigate to the details panel. In the panel you should be able to find a category called Hierarchical LODSettings. In this category you can choose to override both Material Settings and Screen Size.
Hierarchical LOD workflows
The workflow of HLOD can roughly be divided into three different approaches: Fully automatic, semi-automatic and manual. Each of them is described separately below.
Fully automatic workflow
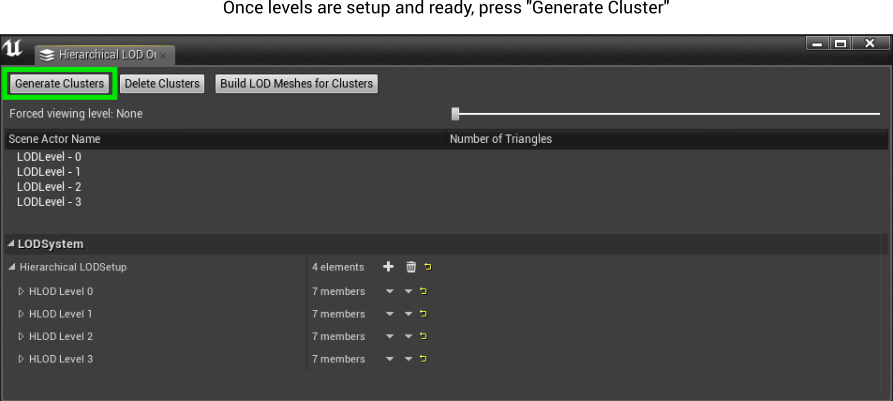
Running a fully automatic process is not complicated at all. All you have to do is to setup your you HLOD levels and press Generate Clusters. To setup levels, see Hierarchical LOD Setup.
Semi-automatic workflow
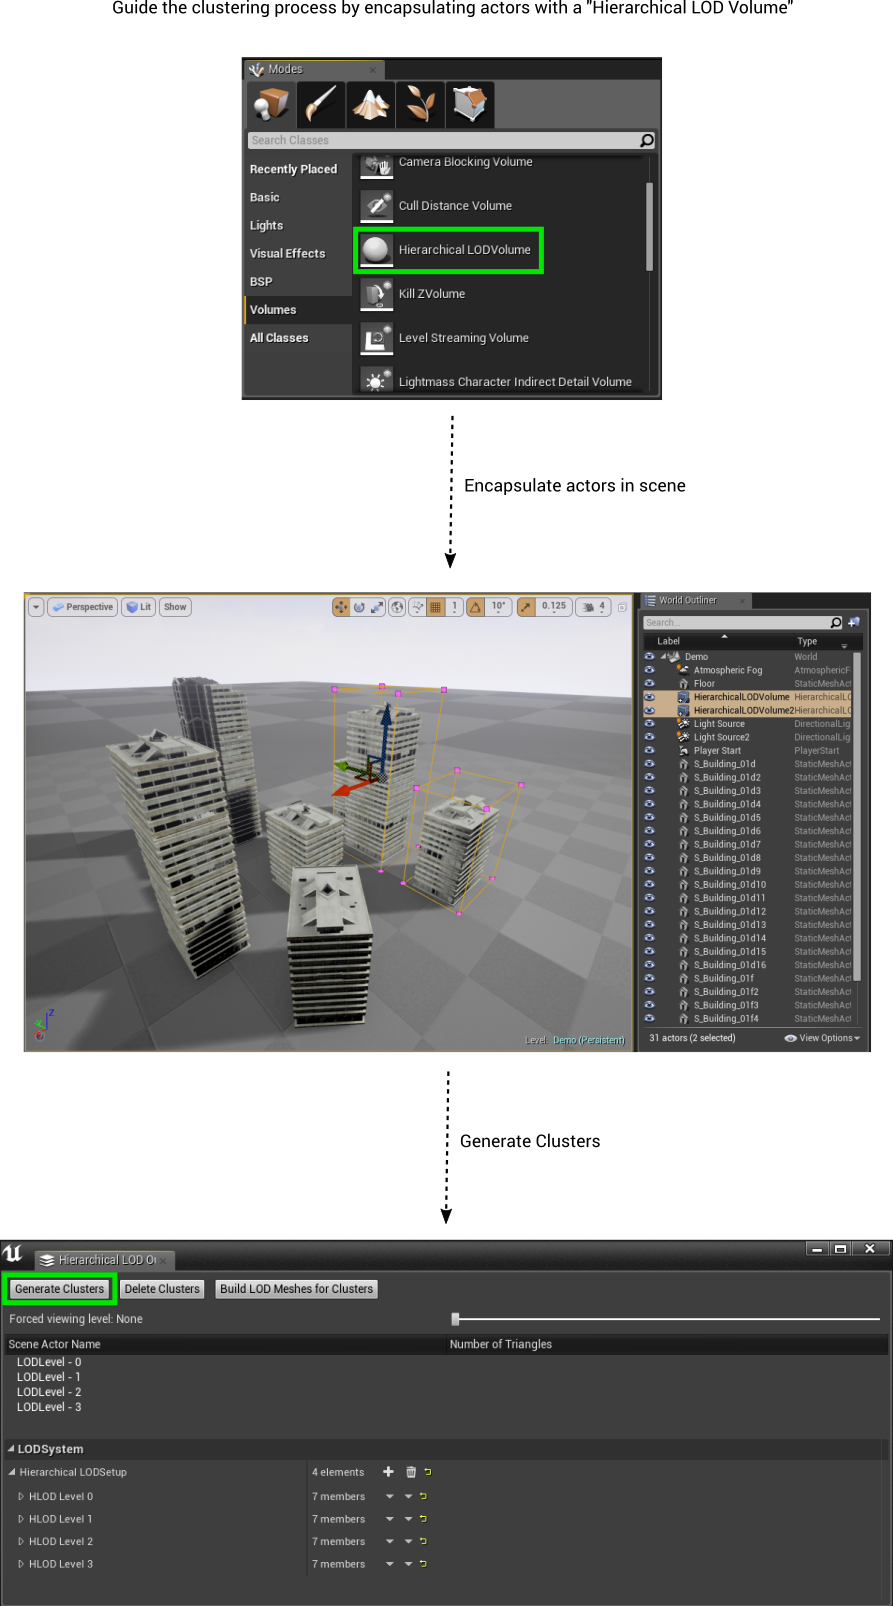
If you feel that fully automatic was good, but that you wish to slightly guide the cluster process a bit. Then you can encapsulate actors with a Hierarchical LOD Volume. The clustering process, when running "Generate Clusters", will respect the volumes and create a cluster for each volume in the scene. The rest of the scene which is not encapsulated by a volume, will automatically be assigned to a cluster. To setup levels, see Hierarchical LOD Setup.
Manual workflow
Warning
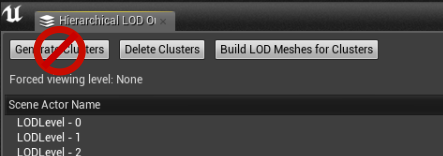
When it comes to a manual workflow we want to give you a big heads up: Do not press Generate Clusters. If you do, all clusters you have made will get lost and overwritten by the clusters generated by the engine.
The rest of this section will cover the basics how to setup an HLOD manual. The aim is to show the concept of the workflow so the scene will be kept simple.
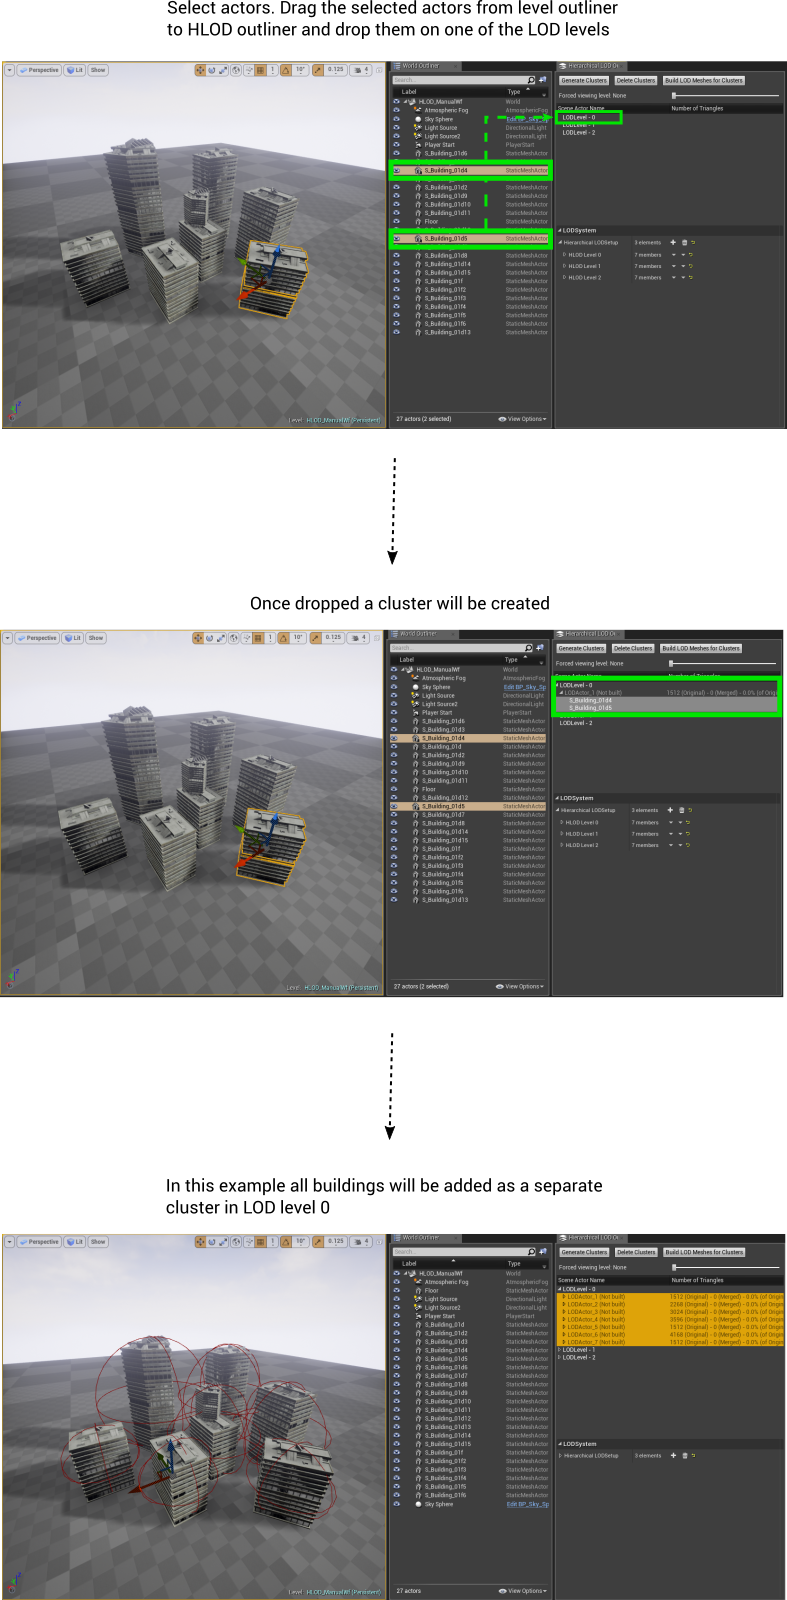
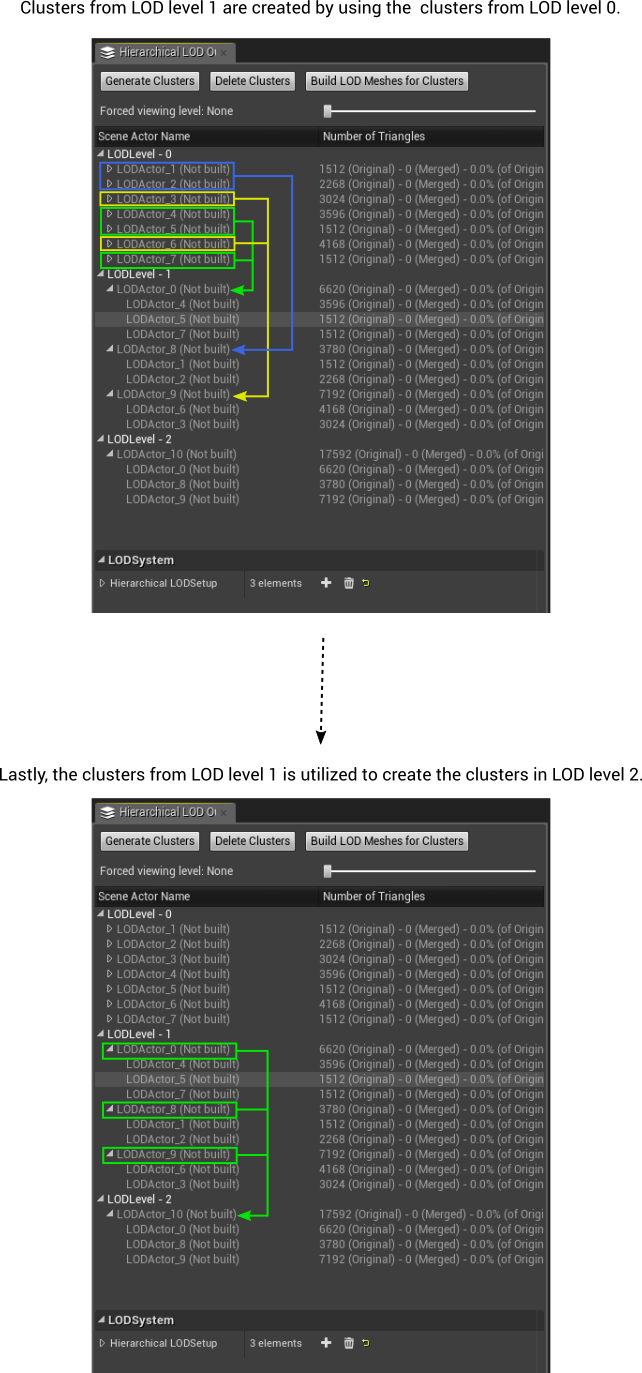
At this stage LOD level 0 has been populated with seven clusters, each representing a building. Next step would be to populate level 1 and level 2. But to do it in a hierarchical manner then we should to reuse the clusters from level 0.
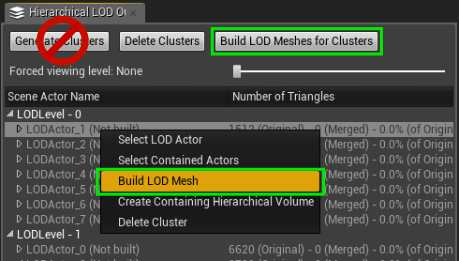
Once you are finished with the clusters it is time to build them. This can be executed either by pressing "Build LOD Meshes for Clusters" or from the context menu by right clicking a cluster
Simplygon Swarm - Distribute LOD work
Since the HLOD is probably going to contain lots of clusters it would be good to be able to distribute the LOD generation work to a "processing farm" (think Lightmass or Incredibuild). Using Simplygon Swarm will let you keep on working with something else during processing since this is handled asynchronously in the background. LODs will automatically be imported once they are done, you may experience some loading/interruptions during the import part. Simplygon Swarm only exists in 4.11 or later
Enable LOD distribution
First of all you need to install the Simplygon Grid package. After the installation the distribution system is enabled through Editor preferences > Miscellaneous > Simplygon Swarm, simply by checking Use Simplygon distributed proxy server. You'll also see that you can change the distribution IP and it can be set locally or to the network coordinator. Setting it locally will still be an asynchronously and non-blocking task.
Please keep in mind that it is only the proxy mesh generation that is distributed. The cluster generation and material flattening are still blocking tasks.
Editor preference settings
| Type | Description |
|---|---|
| Use Simplygon distributed proxy server | Whether to enable or disable Simplygon Swarm. |
| Simplygon distributed proxy server IP | IP to the coordinator. Can be set locally. |
| Enable Swarm Debugging | If enabled, debug text will be printed in the output window and SSF files will not be cleaned up. |
| Delay time in (MS) | Delay between json requests. |